

 III
III
Published Pages
What publishing does, when you need it, and how to manage the pages you use in your Tracker.
This page explains what publishing a page does, when you need it, and how to manage the pages you have published.
Publishing does not put a page online. Every file in a Lander Upload is already online once your page domain is active. Publishing gives a page a name and a place in your page lists, and lets you pick it as a lander in the Tracker.
Do you need to publish?
- To run tracked campaigns, yes. A campaign shows your page through a lander in the Tracker, and a lander can only use a published page.
- To host a website, no. Set up your page domain, add your files, and they are online.
To use a published page in a campaign, go to Tracker → Landers and click Create Lander, or edit an existing lander. Set Type to Published Pages, then pick the page under Select Published Page. Pages you have not published are not in that list. See Landers.
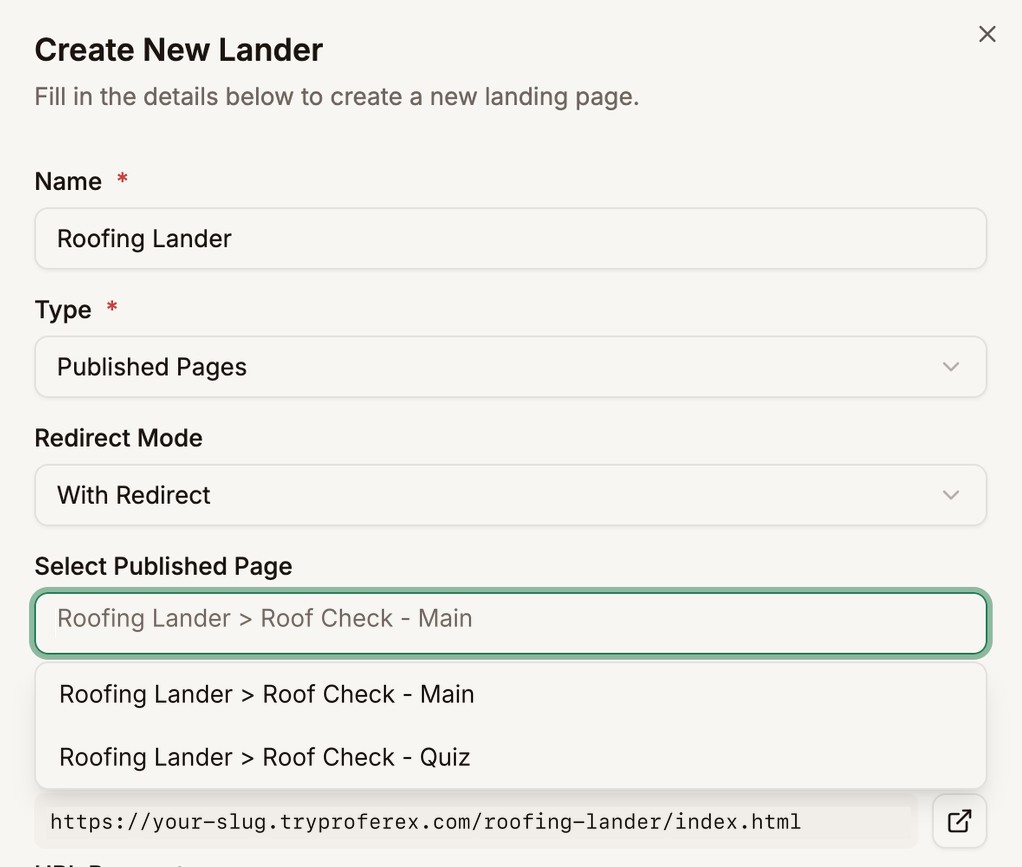
Publishing also makes pages easier to manage: you get names, groups, search, Copy URL, and a warning before you delete a page a campaign still uses. So it can be worth publishing the pages you work on often, even outside the Tracker.
Publish a page
Open the upload in the File Manager and click Publish next to the HTML file. Pages that are already published show a green Published label instead.
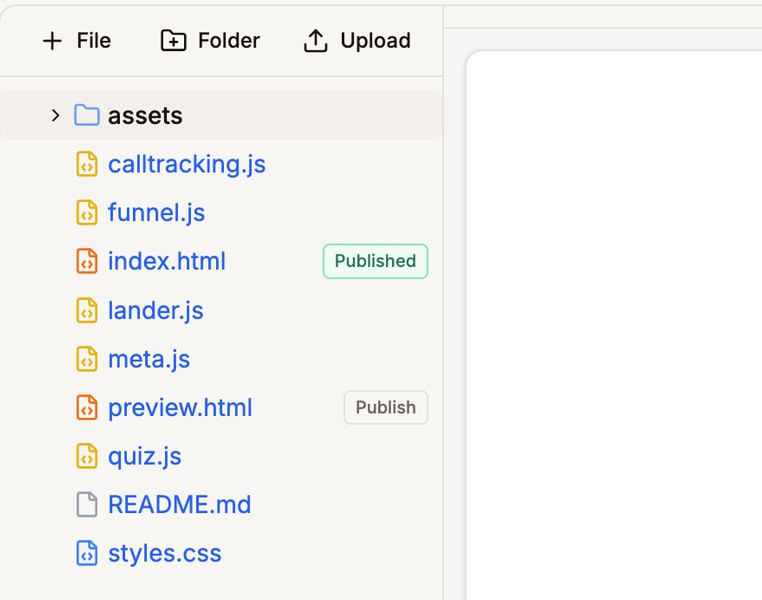
index.html is published. preview.html is not yet Give the page a Name. Pick one you will still recognise next month, because it is what you see in your lists and in the Tracker. If you like, pick a Group, or type a new one and choose Create. See Groups.
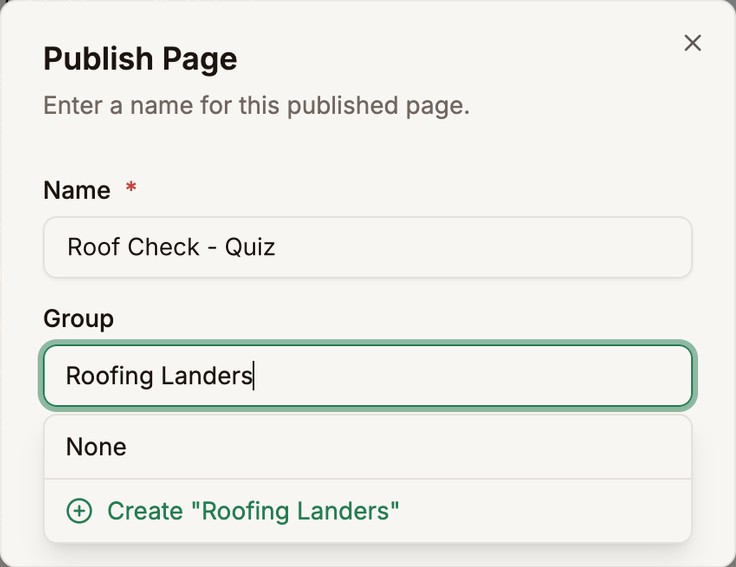
Name the page and, if you like, give it a group Click Publish Page. The page shows up in your lists, and in the Tracker, straight away.
A file is either published or not. Publishing it again does not make a copy.
The default page
The first page you publish in an upload becomes its default page. It is the page Copy URL in the Lander Uploads list points to, and you cannot delete its file while it has that role.
When you upload a zip, Proferex publishes the home page for you, usually the top-level index.html, and makes it the default page. An upload made with Create New has no published pages until you publish one.
Many landers in one upload
One upload does not have to be one lander. You can put the landers for several campaigns in a single upload, each in its own folder, and publish each one separately. Every published page is its own choice in the Tracker.
roofing-landers/
├── assets/            images and styles shared by every lander
├── quiz/index.html    → publish as "Roof Check - Quiz"
├── call/index.html    → publish as "Roof Check - Call"
└── es/index.html      → publish as "Roof Check - Spanish"
This keeps related landers together, lets them share images and styles, and makes a new test as quick as adding a folder and publishing it. Each lander still gets its own address, such as pages.yourbrand.com/roofing-landers/quiz/.
Splitting landers into separate uploads works too. Use whichever is easier for you to manage.
How page addresses work
A page's address has three parts: your page domain, the upload's slug, and the file's path inside the upload. This is the same for every file, published or not.
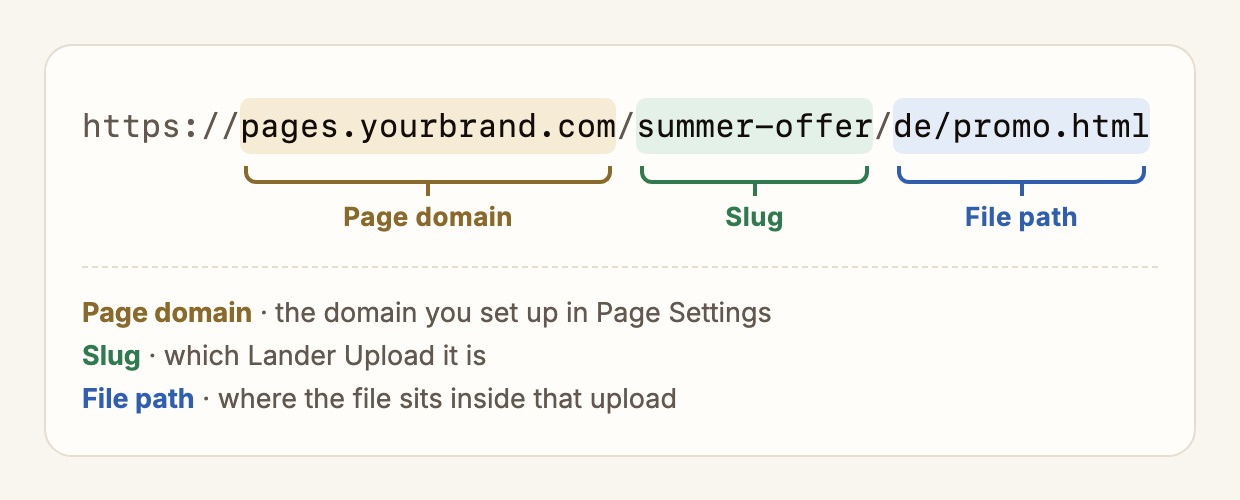
- Every active page domain serves every page. If you have three domains, each page opens on all three. Choose which one to share.
- Changing the slug or moving the file changes the address. Old links stop working, so settle both before you send traffic.
- You can leave out
.html./summer-offer/de/promoopens the same page as/summer-offer/de/promo.html. - A folder address opens its
index.html.pages.yourbrand.com/summer-offeropens the upload's top-levelindex.html./summer-offer/deand/summer-offer/de/both opende/index.html, unless there is also ade.htmlnext to the folder. Then/summer-offer/deopensde.html.
Pages only open once your page domain is Active. See Page Domain.
Find your pages
You see published pages in two places:
- Under Landing Pages → Published Pages, for every page in your account.
- Inside an upload, on its Published Pages tab, for that upload's pages.
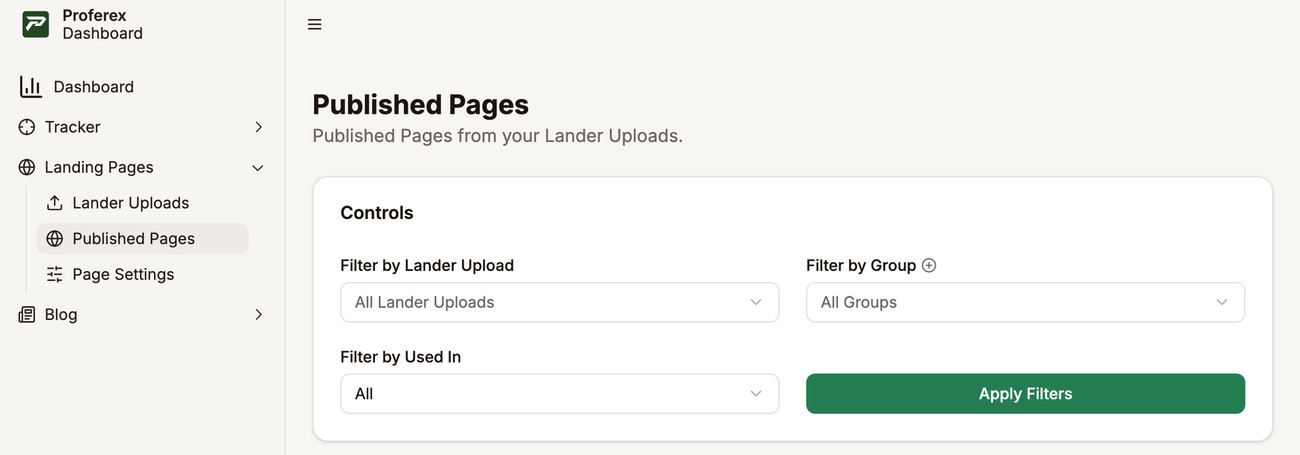
Below the filters, it lists every published page in your account:
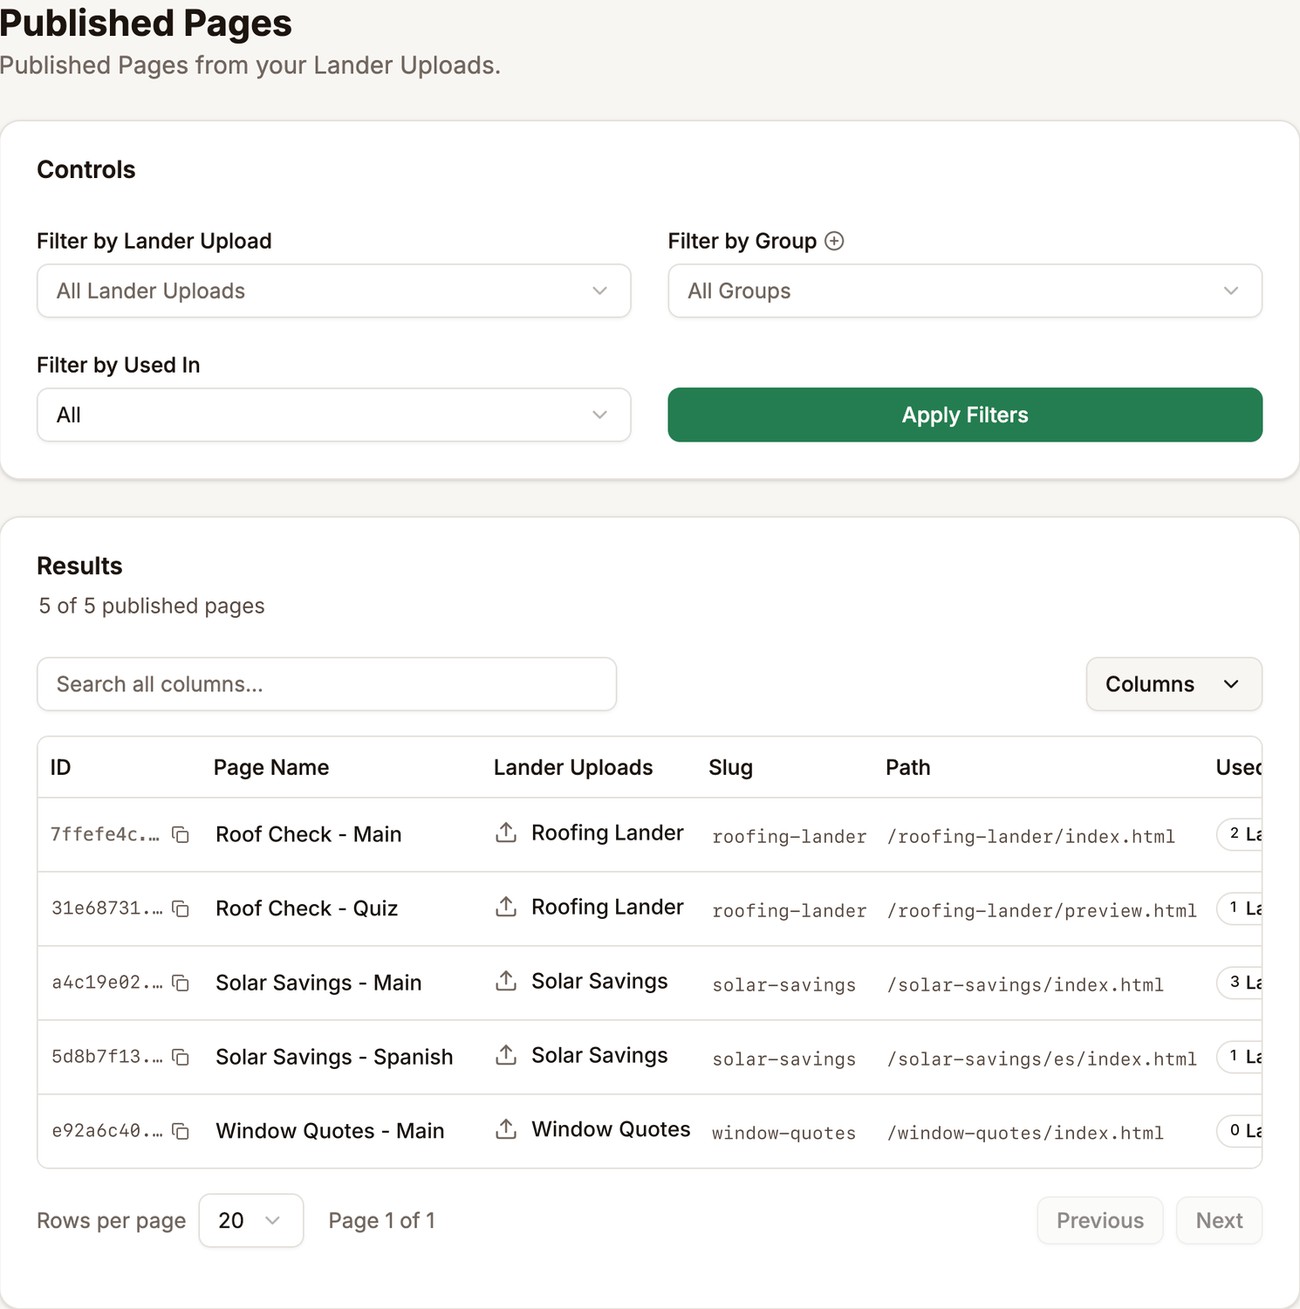
Inside an upload, the Published Pages tab shows the same list for that upload's pages:
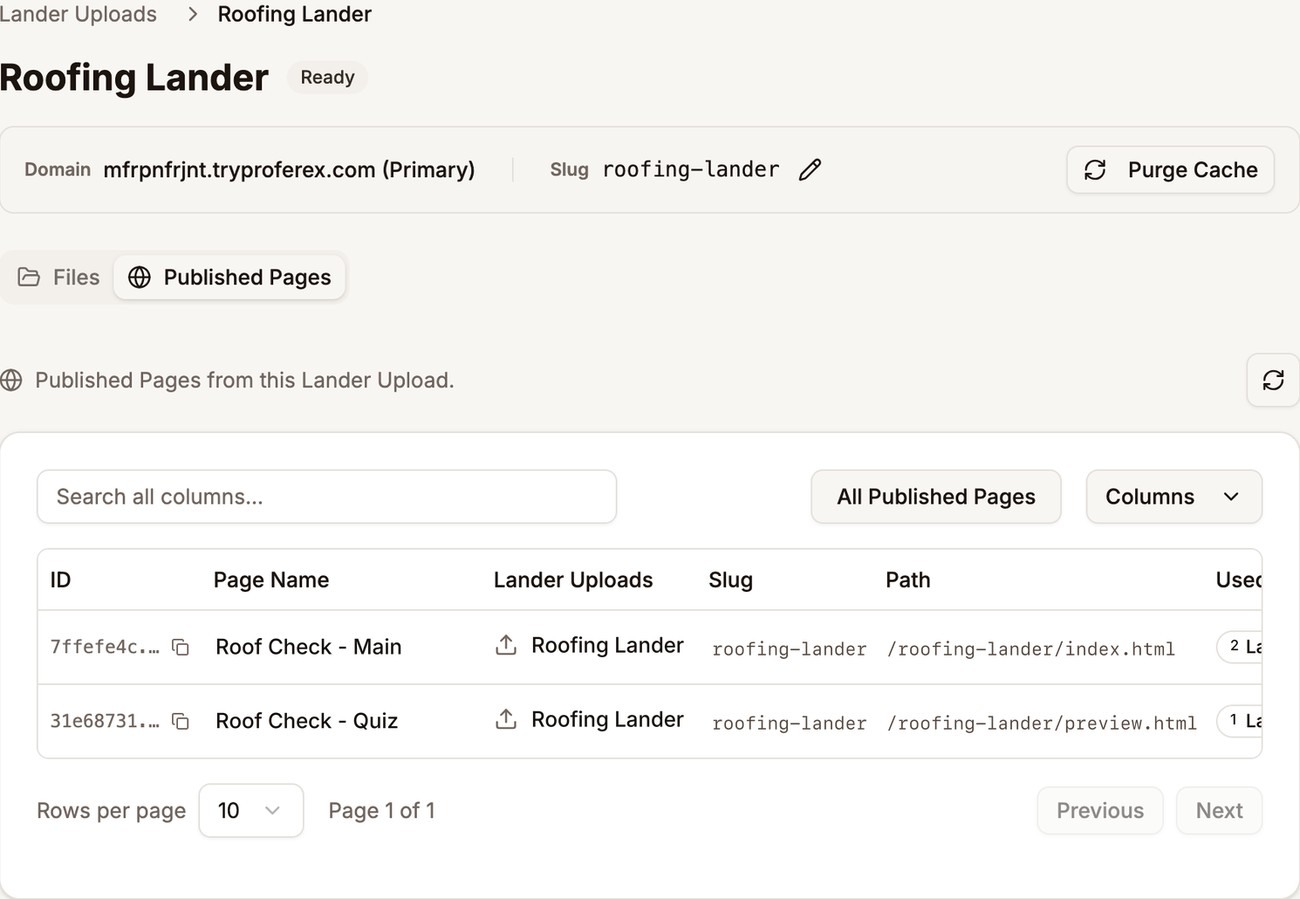
| Column | What it shows |
|---|---|
| Page Name | The name you gave the page. |
| Lander Uploads | The upload the page belongs to. |
| Slug | The upload's slug. |
| Path | The page's path, such as /summer-offer/de/promo.html. |
| Used In | How many landers in the Tracker use this page. |
| Group | Its group, if it has one. |
| Created | When you published it. |
The account-wide list also lets you search and filter by upload, by group, or by use. Filtering to pages no lander uses is a quick way to find pages to clean up.
Row actions
Open the ⋯ menu at the end of a row.
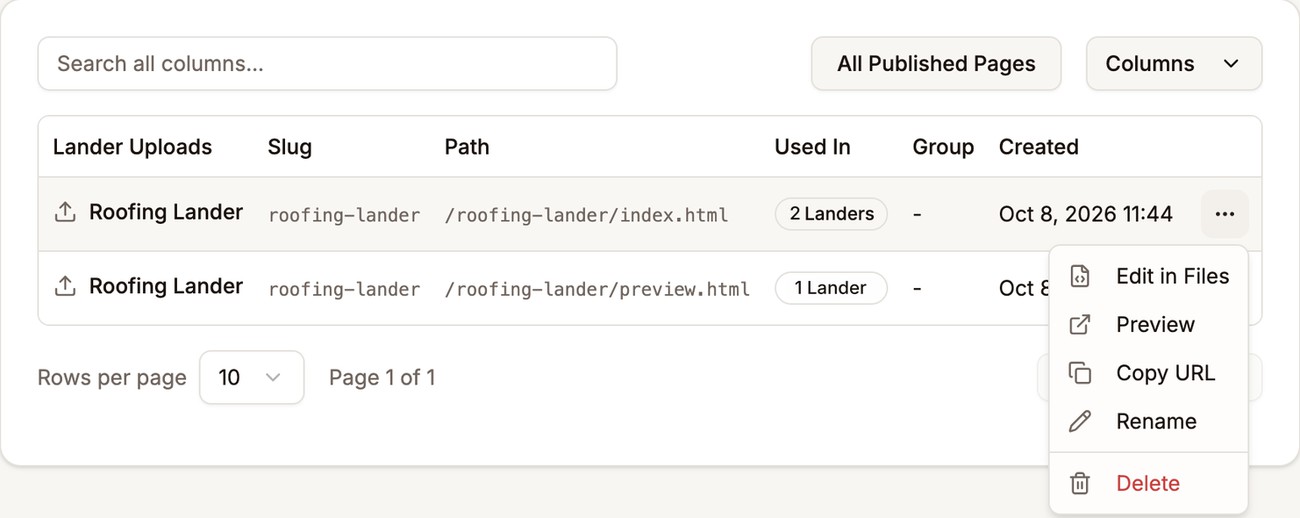
- Edit in Files opens the page's file in the editor, ready to fix.
- Preview opens the live page in a new tab.
- Copy URL copies the page's address for your ads, emails, or anywhere else.
- Rename changes the page's name and group. The address stays the same.
- Delete unpublishes the page. It leaves your lists and the Tracker, but the file stays in the upload and stays online. To take a page offline, delete its file in the file manager.
Groups
Groups are labels for keeping pages together, by campaign, language, client, or whatever suits you. Groups do not change how or where pages open.
Add a page to a group when you publish it, or later with Rename. Type a group name, and if it does not exist yet, choose Create to make it.
To make a group ahead of time, click ⊕ next to Filter by Group on Landing Pages → Published Pages.
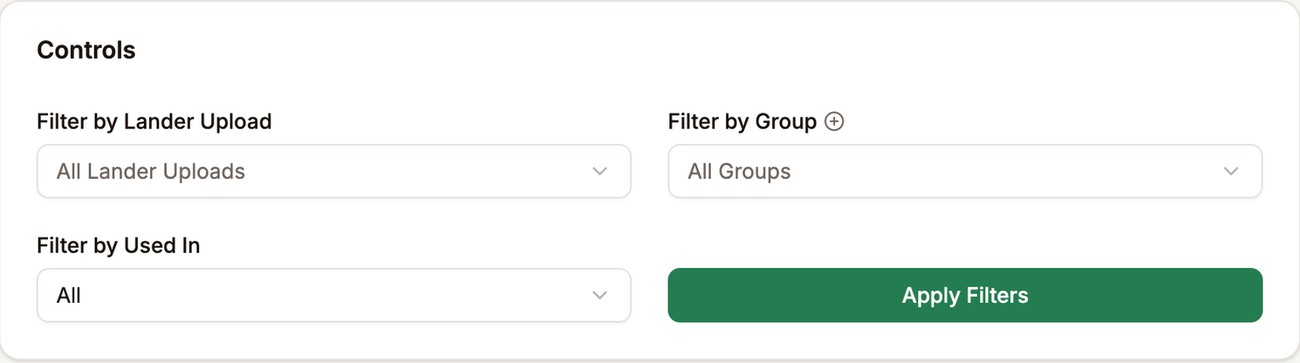
To see only some groups, pick them under Filter by Group and click Apply Filters. You can pick more than one.
Deleting a page a campaign uses
Used In shows how many landers in the Tracker use a page. Proferex will not let you delete a page while any lander still uses it, and it tells you how many do. That way you cannot pull a page out from under a running campaign. Point those landers at another page, or delete them, and then delete the page.
A page with 0 Landers can be deleted without affecting anything else.
Next step
Use a published page in a campaign. See Landers.