

 II
II
Page Domain
Use your free page domain, or connect your own, to put your landers online.
This page shows you how to use your free page domain and how to connect a domain of your own for your landing pages.
Your page domain is the web address your Published Pages open on, such as pages.yourbrand.com/summer-offer. Visitors see it in the address bar when they land on your page.
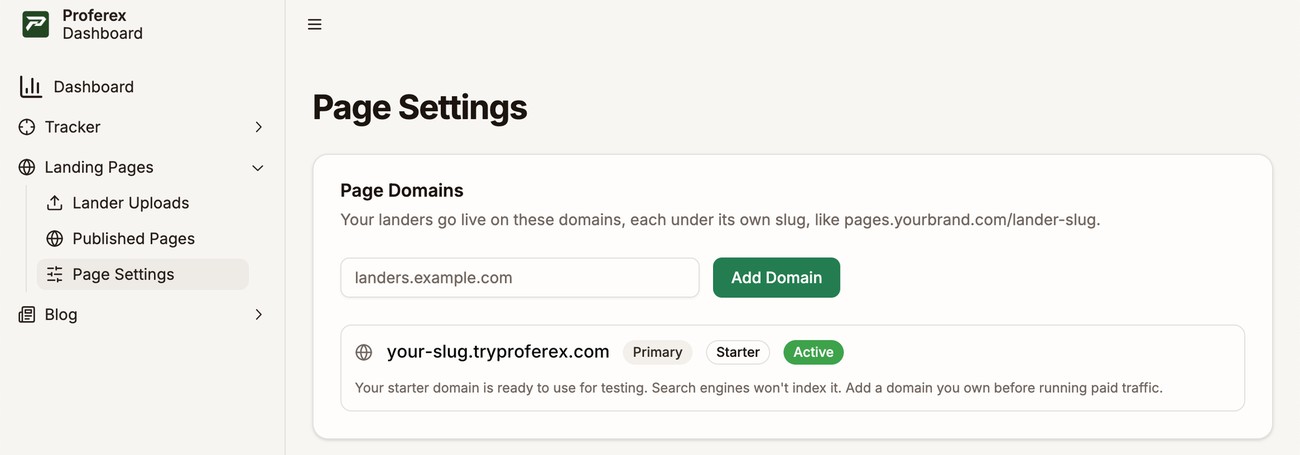
You manage your page domains in Landing Pages → Page Settings, under Page Domains.
Your free page domain
Every account comes with a free page domain. It is ready the moment you sign up, so you can publish and preview pages straight away.
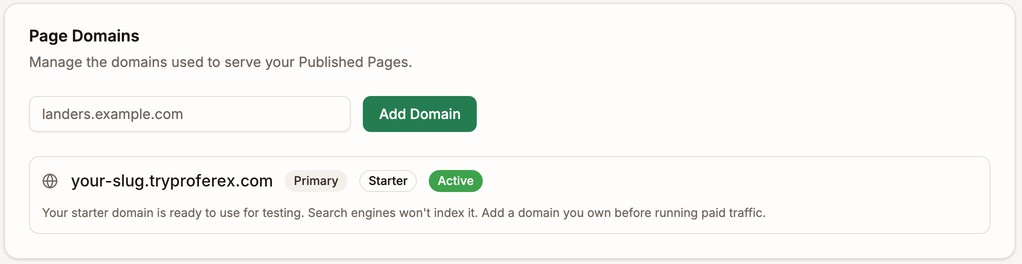
It carries a Starter badge. It stays in your list for good, even after you add your own domain, and it cannot be deleted.
Why use your own domain
Your free page domain is good for building and testing. Before you send paid traffic to a page, move it to a domain you own.
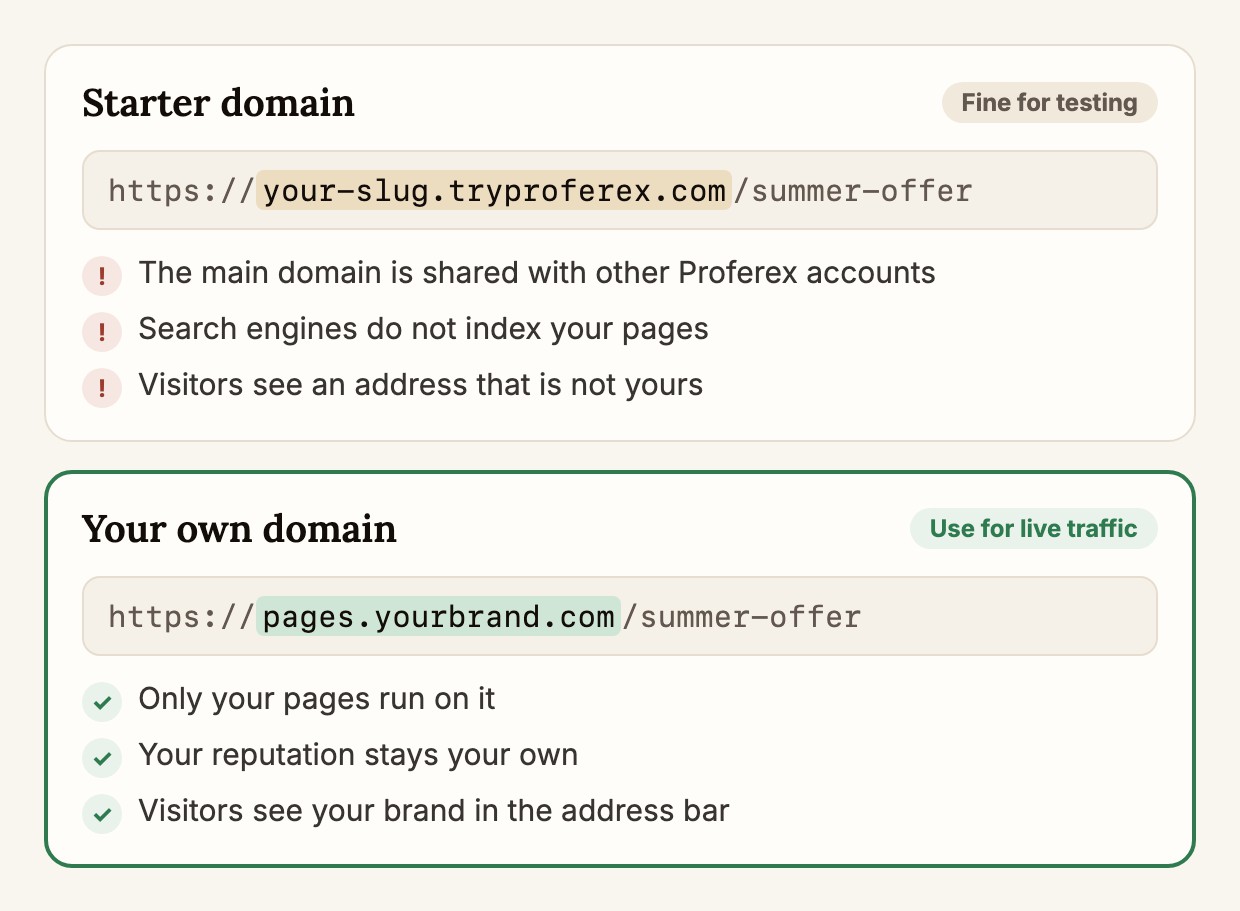
- Your reputation stays your own. The free domain sits under a main domain that other Proferex accounts share. If someone else gets it flagged, your pages can suffer too.
- Search engines can find your pages. Pages on the free domain are hidden from Google and other search engines. Pages on your own domain are not.
- Visitors see your brand. The address bar shows
pages.yourbrand.com, not a Proferex address.
Page domain and tracking domain
Proferex uses two domains, and each has its own job. Your tracking domain runs the campaign links in your ads. Your page domain shows your landing pages.
They can be any two domains you own, or two subdomains of the same domain. If you only have one domain, give each job its own subdomain, such as track.yourbrand.com and pages.yourbrand.com.
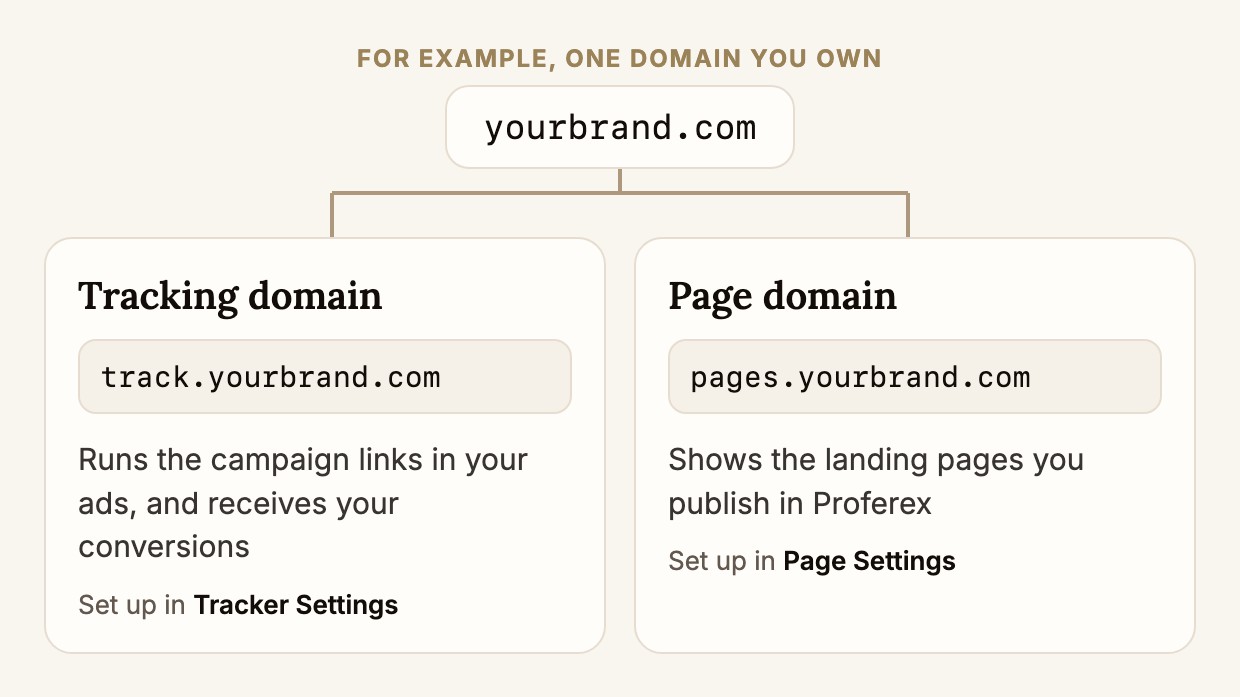
If you have not set up your tracking domain yet, see Tracking Domain.
Add your page domain
Step 1 - Choose an address
Use a subdomain of a domain you already own, such as pages.yourbrand.com or offers.yourbrand.com. A subdomain is quicker to set up and keeps your landing pages apart from your main website.
A root domain such as yourbrand.com also works, but many DNS providers need extra settings for it. See Troubleshooting.
The address can only contain letters, numbers, and hyphens. IP addresses are not accepted.
A domain can belong to only one Proferex account. If you are told the domain is already in use, it is connected to another account and has to be removed there first.
Step 2 - Add it in Proferex
Type your domain in the Page Domains box and click Add Domain.
Paste it in any form you like. https://pages.yourbrand.com/ is tidied up to pages.yourbrand.com for you.
Your domain appears in the list as Pending Verification. That is expected. It stays that way until you add the DNS records in the next step.
Step 3 - Add the DNS records
Click DNS next to your domain. The DNS Setup Required panel lists the records to add, usually one CNAME and two or three TXT records.
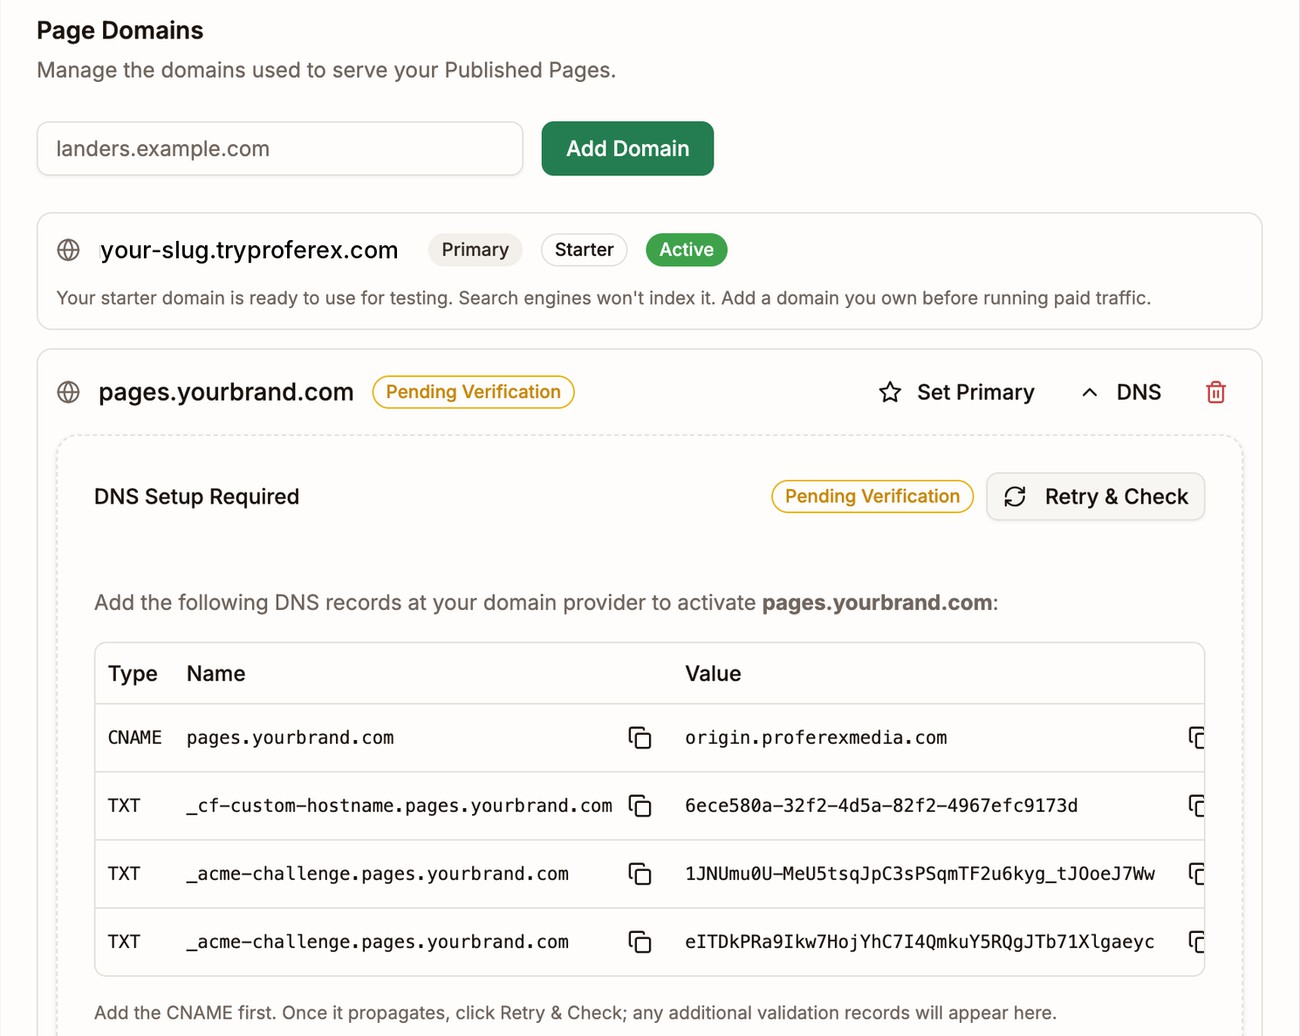
Open the site where you bought your domain, such as GoDaddy, Namecheap, or Cloudflare. Find its DNS settings. They are often called DNS, DNS Records, or Manage DNS. Then add each record:
- Pick the record type from the Type column.
- Copy the Name into the host or name field.
- Copy the Value into the value, target, or content field.
- Save.
Each name and value has a copy button, so you never need to type them.
Add the CNAME first. Some TXT records only show up once the CNAME is in place, so come back to the panel after you save it.
Step 4 - Wait for it to go live
DNS changes usually take a few minutes to reach the rest of the internet. With some providers it takes a few hours.
Keep the settings page open and Proferex checks your domain again on its own. To check straight away, click Retry & Check in the DNS panel.
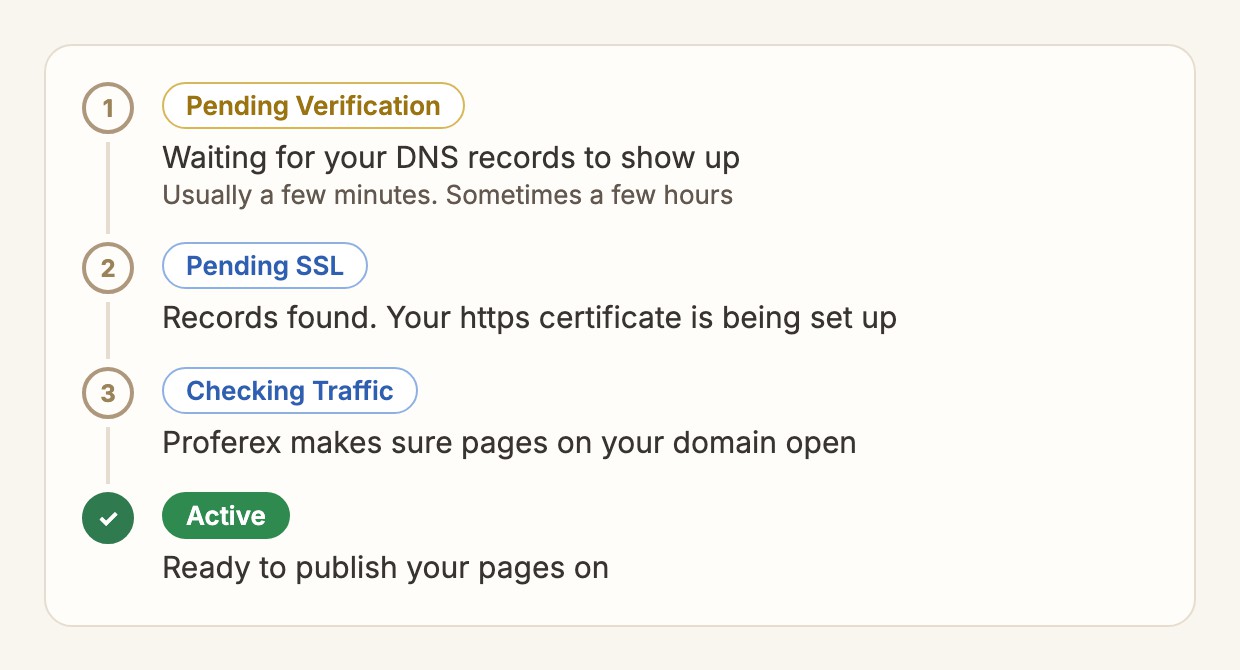
When the status reads Active, your domain is ready. Your https certificate is set up for you, so there is nothing else to do.
You can only publish a page on an Active domain. Until then, the domain does not appear in the list when you publish.
If you see Not Reachable or Error instead, see Troubleshooting.
How your page addresses work
Each Lander Upload has a short name called a slug. Its pages open on your page domain under that slug.
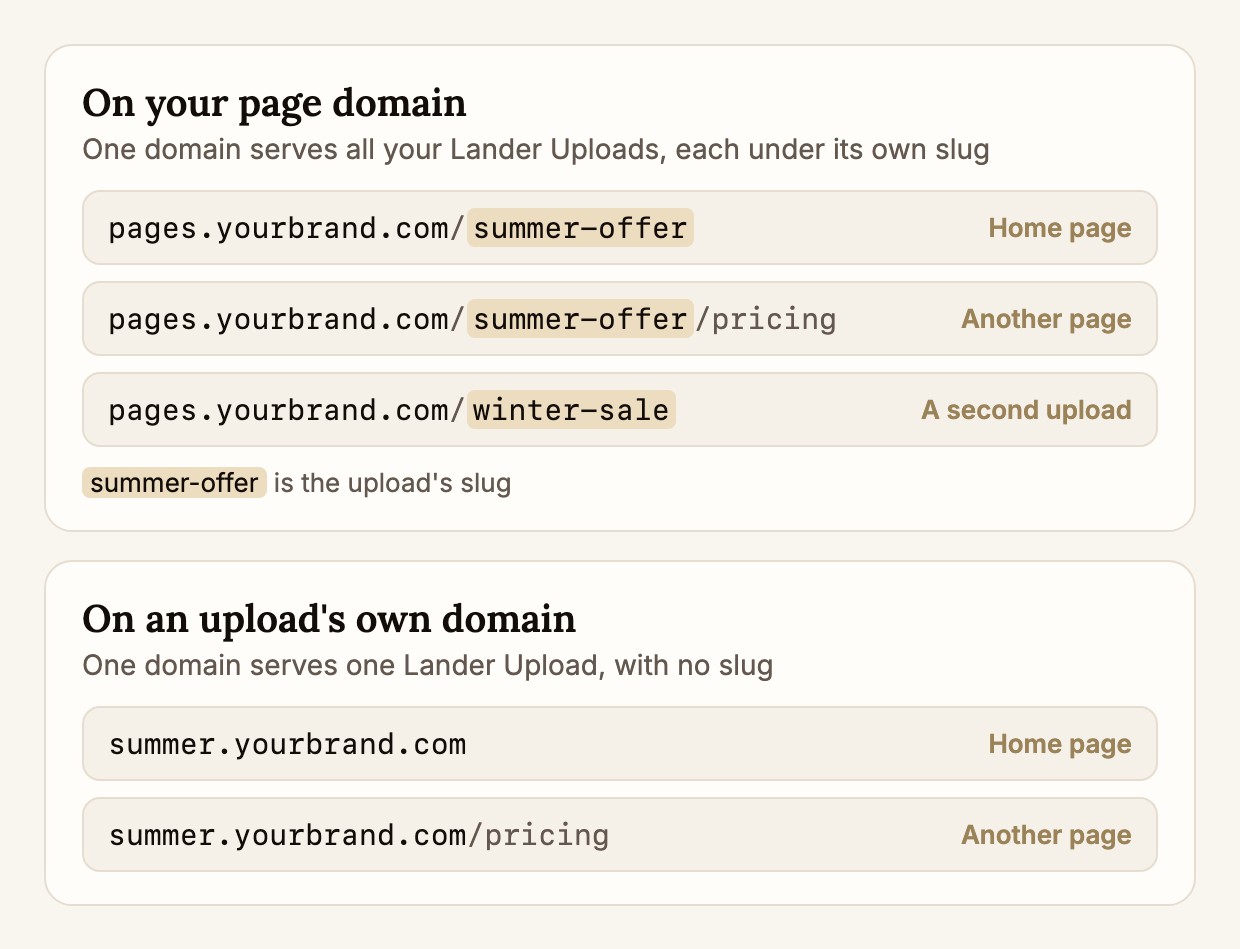
- The home page is at
pages.yourbrand.com/summer-offer. It shows theindex.htmlfile at the top level of the upload. If that file sits inside a folder, this address cannot find it. - Other pages and files sit under the same slug, such as
pages.yourbrand.com/summer-offer/pricingorpages.yourbrand.com/summer-offer/images/logo.png. - You can leave out
.html./summer-offer/pricing,/summer-offer/pricing/, and/summer-offer/pricing/index.htmlall open the same page.
Proferex picks the slug when you add the upload. You can change it any time on the Lander Uploads screen.
Set your primary domain
Your primary domain is the one Proferex picks for you first when you publish a page. It is only a starting point. You can pick any active domain from the list instead.
At first your primary is the free page domain. Once your own domain is Active, click Set Primary next to it so new pages use it.
Your primary domain cannot be deleted. To remove it, make another domain primary first.
Using more than one domain
You can add as many page domains as you need. Give each brand or offer its own address, then choose the domain when you publish each page. Every domain goes through the same DNS setup.
Give a Lander Upload its own domain
A Lander Upload can also have a domain all to itself. It then opens right at the address, with no slug, such as summer.yourbrand.com or yourbrand.com. This suits an upload that is a complete website, or a page you want to share with the shortest possible address.
| Added in Page Settings | Added on a Lander Upload | |
|---|---|---|
| Shows | All your Lander Uploads | Only that upload |
| Address | pages.yourbrand.com/roofing-lander | mybrand.com |
To set it up:
Go to Landing Pages → Lander Uploads and find the upload.
Open the ⋯ menu at the end of its row and choose Domains.
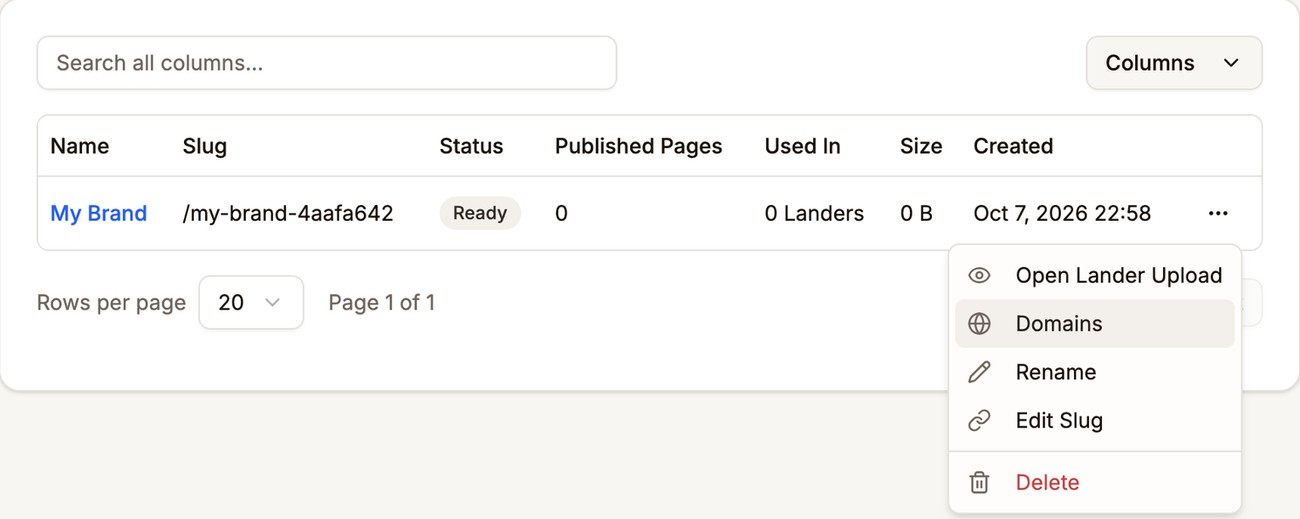
Open Domains from the upload's menu Type your domain and click Add Domain. Then add the DNS records the same way as in Add your page domain. The statuses are the same too.
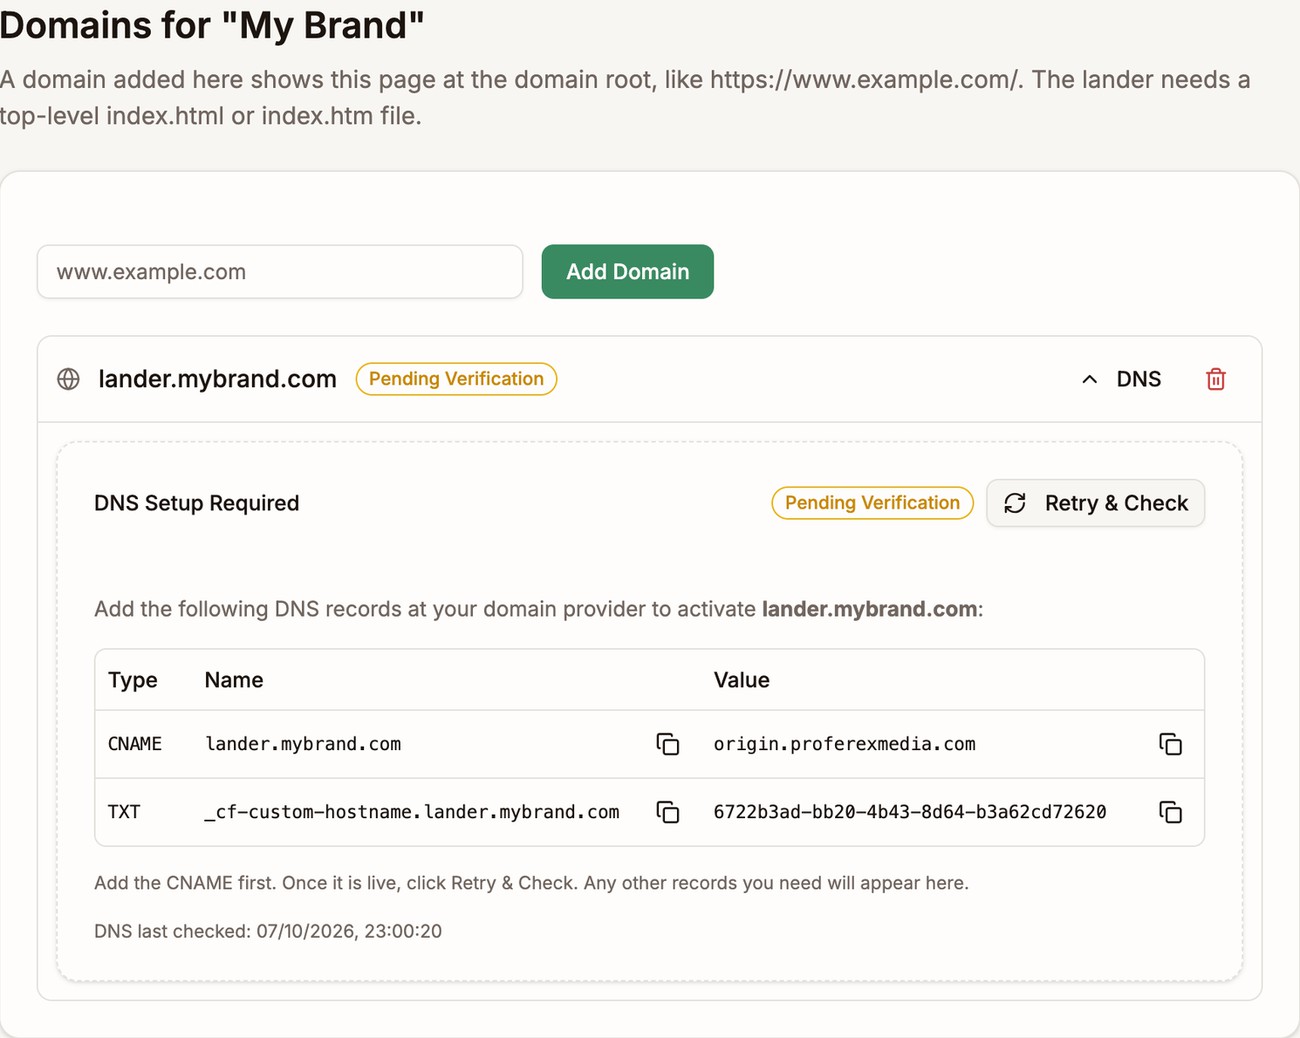
lander.mybrand.com, connected to one upload
The upload needs a home page named index.html or index.htm at its top level. That is the page visitors see when they open the domain. If it is missing, Proferex asks you to add one before you connect the domain.
Troubleshooting
It stays on Pending Verification. Check that each name and value matches exactly, with no extra spaces. Many providers add your domain to the end of the name for you. If yours does, enter only the first part, such as pages instead of pages.yourbrand.com.
My provider will not accept a CNAME on my root domain. Most providers do not allow it. Look for a record type called ALIAS or ANAME, or a setting called CNAME flattening. If your provider has none of these, use a subdomain such as pages.yourbrand.com. It is the easier route.
It shows Not Reachable. The certificate is ready, but pages on your domain are not opening. Check that the CNAME is still in place at your provider. If you recently moved your domain to a new provider, add the CNAME there as well. Then click Retry & Check.
It shows Error. The DNS panel explains what went wrong. Fix the records it mentions, then click Retry & Check.
My domain is missing when I publish a page. Only Active domains can be used. Check the domain's status in Page Settings.
Hours have passed and nothing has changed. Make sure you added the records to the same domain you entered in Proferex, and that you saved them. Some providers have a separate Publish or Apply changes button. If yours does, click it.
Next step
Once your domain is Active, make it your primary. Every page you publish from then on opens on your own domain.