

 IV
IV
Traffic Sources
Add the traffic sources you buy your traffic from.
This page shows you how to add the traffic sources you buy ads from, such as TrafficStars, ExoClick, or TrafficJunky.
Add one for each traffic source you use. Once it is set up, Proferex can:
- Show what each traffic source sends you. Traffic sources can pass data with every visit, such as their campaign ID, zone, or site. Proferex saves it, so you can see which ones make money.
- Show your costs. For traffic sources with an adapter, Proferex pulls your ad spend automatically, so your profit and ROI are right. See Traffic Source Integrations for the traffic sources that have one.
- Send conversions back to the traffic source. Your conversions come from your offer source. Proferex then passes them on to the traffic source with a postback, so you see your conversions right inside the traffic source. That shows you which spots, ads, and campaigns are working, so you can optimise them there.
Go to Tracker → Traffic Sources to see yours, and click Create Traffic Source to add one.
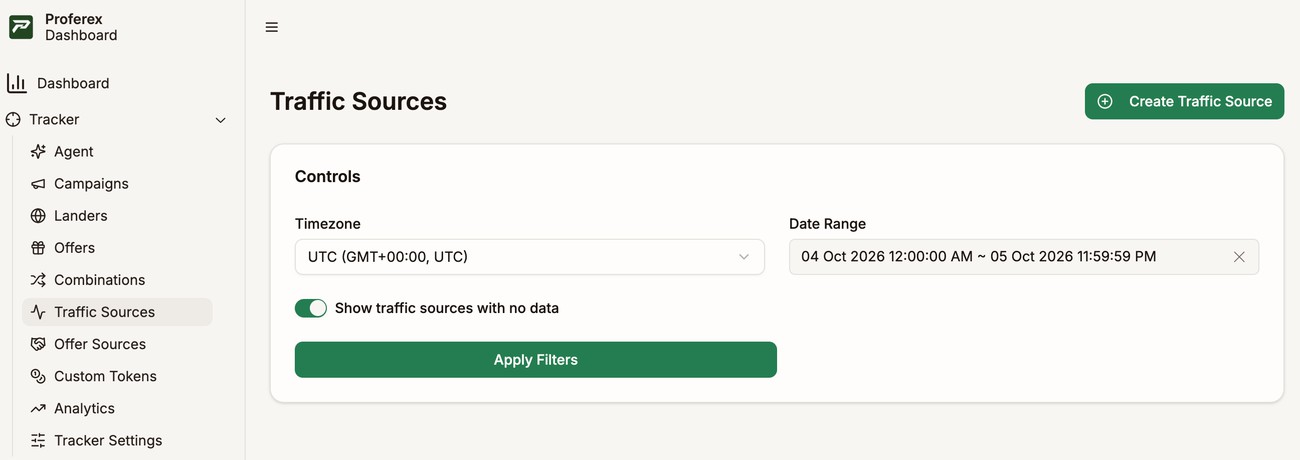
Use a template if there is one
Click Create Traffic Source, then Templates, and pick your traffic source. The template fills in the whole form for you. You then only add your own account details.
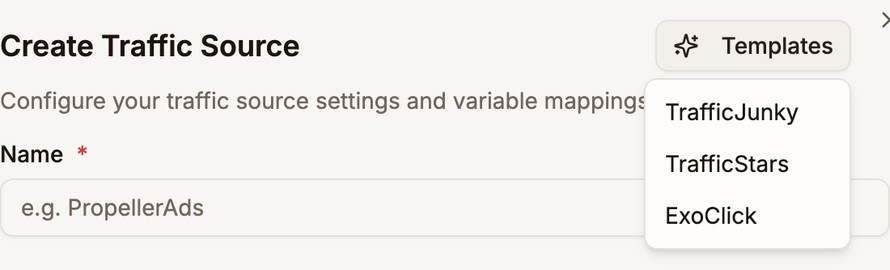
See Traffic Source Integrations for the traffic sources with a template.
If your traffic source has no template, fill in the form as shown below.
URL variable mappings
Here you choose which data your traffic source sends with each visit.
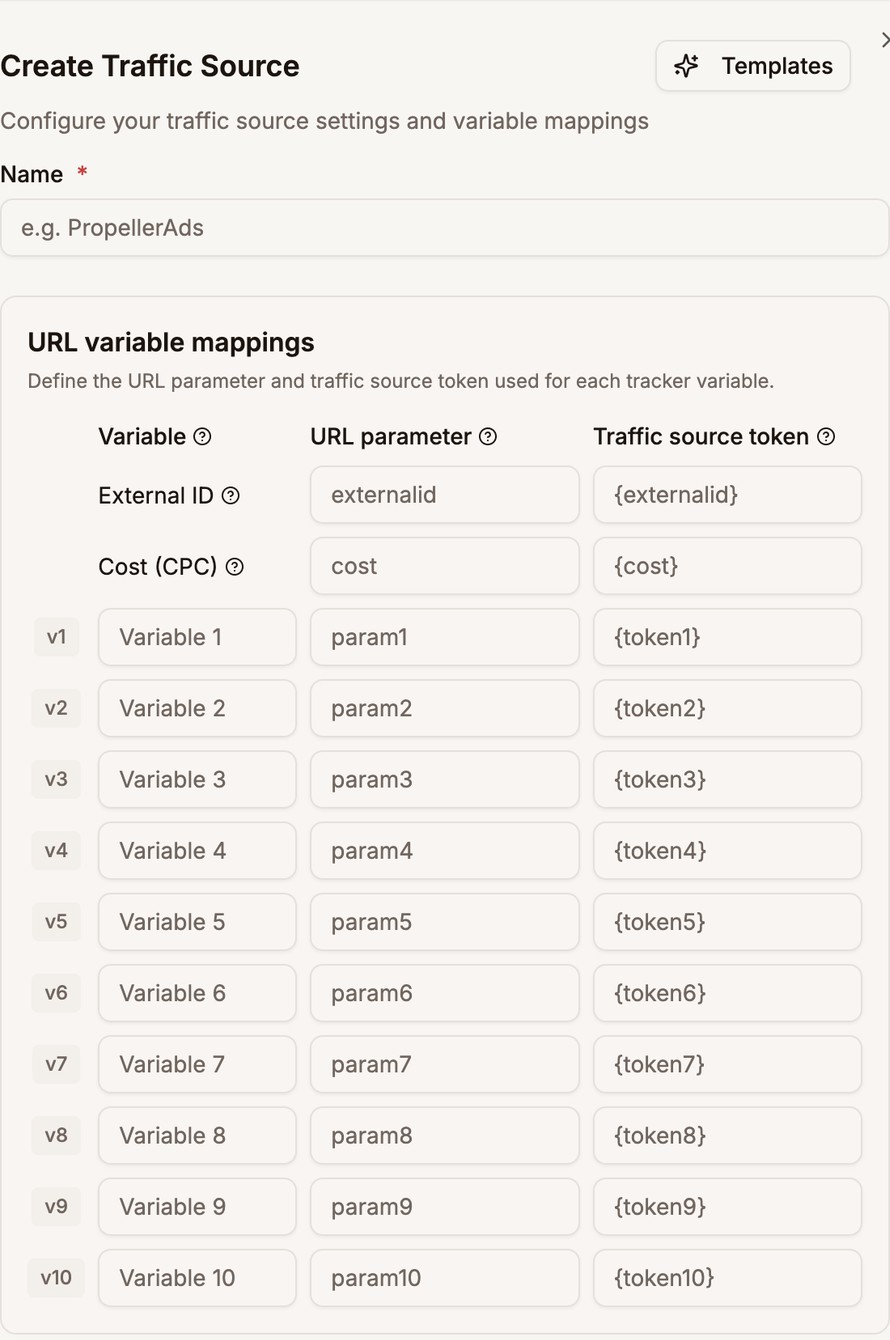
Each row has three boxes:
| Box | What to enter | Example |
|---|---|---|
| Variable | A name you will recognise in reports | Campaign ID |
| URL parameter | The name used in your campaign link | campid |
| Traffic source token | The traffic source's macro for the value. Copy it from the list of macros your traffic source gives you | {campaign_id} |
Say you add two rows: Campaign ID, with the URL parameter campid and the token {campaign_id}, and Creative ID, with creaid and {variation_id}. Proferex adds both to your campaign URL for you:
https://track.yourbrand.com/l/your-alias/my-campaign?campid={campaign_id}&creaid={variation_id}This is the URL you put in your ad. When someone clicks the ad, the traffic source swaps each macro for the real value, so the visitor arrives on:
https://track.yourbrand.com/l/your-alias/my-campaign?campid=48211&creaid=9921Proferex saves 48211 as the campaign ID and 9921 as the creative ID for that visit.
External ID and Cost (CPC)
These two rows are used by Proferex features.
- External ID is the traffic source's own ID for the visit. Proferex sends it back in the postback as
{externalid}, so the traffic source knows which visit converted. Fill it in if you want to see your conversions in the traffic source. - Cost (CPC) is what the traffic source charged for the visit, if it can send it. Proferex uses it as the cost of each visit on campaigns with the CPC cost model, instead of the campaign's Static CPC. If cost sync is on, the cost from the traffic source's API is used instead. Leave this row empty if your traffic source can't send a cost. See Costs.
v1 to v10
You can use up to 10 variables, v1 to v10, for anything else the traffic source can send, such as the campaign ID, creative, zone, site, or keyword. Proferex saves them with each visit.
In Analytics, break your numbers down by V1 to V10 to see which zones, sites, or creatives make money. On a campaign's own page, hover over V1 to V10 to see the names you gave them.
Campaign cost sync needs the traffic source's campaign ID, so put it in one of these rows. See Cost sync.
Configuration
Cost sync
Pick your traffic source under Traffic Source Adapter to pull your ad spend from your account automatically. Your costs then match what the traffic source charged you.
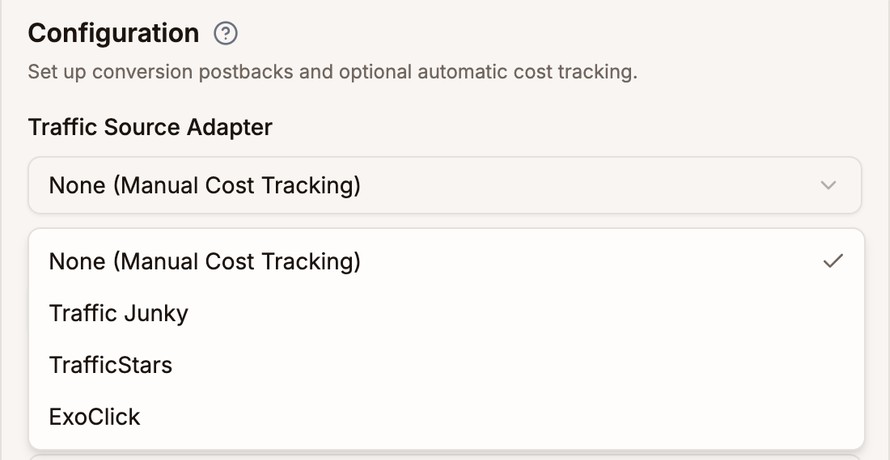
You need to add two things:
- API Key from your traffic source account. The traffic source's page in Traffic Source Integrations shows where to find it.
- Campaign ID Token, the row (
v1tov10) that holds the traffic source's campaign ID. Proferex uses it to match each day's campaign spend to the right visits. Templates set it for you. Visits that arrive without a campaign ID can't get synced campaign costs, so they use the Cost (CPC) row or the campaign's Static CPC or Static CPA instead.
API Timezone and Traffic source currency are set for you, to match how the traffic source reports spend. For some traffic sources you can change them, for example if the detected value is wrong.
If you don't want cost sync, set Traffic Source Adapter to None (Manual Cost Tracking). This works even if a template filled it in. Your costs then come from the Cost (CPC) row, or from the Static CPC or Static CPA you set on each campaign. See Costs.
Postback URL
When your offer source reports a conversion, Proferex passes it on to the traffic source through the Postback URL. You then see your conversions in the traffic source's own reports, next to its spots, ads, and the rest of its data.
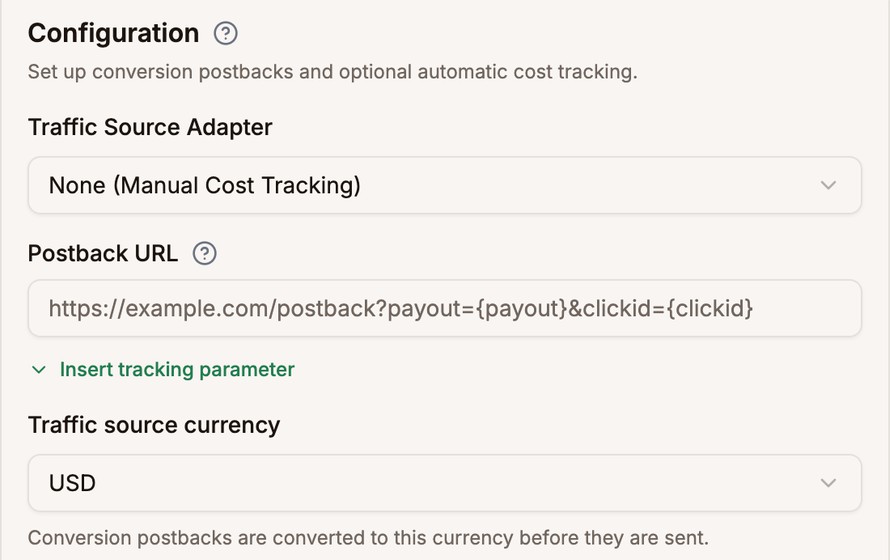
If your traffic source is in Traffic Source Integrations, its page gives you the postback URL to use.
For any other traffic source that supports postbacks, copy the postback URL from your traffic source's conversion tracking settings, then add Proferex placeholders where the traffic source wants its values:
{externalid}, the traffic source's ID for the visit. Always needed, so the traffic source knows which visit converted.{payout}, what the conversion was worth. Add it if your traffic source accepts a conversion value.
Set Traffic source currency to the currency your traffic source expects. Proferex converts {payout} to it before sending.
Insert tracking parameter
Click Insert tracking parameter under the Postback URL to see every placeholder you can use. Click one to add it to the Postback URL.
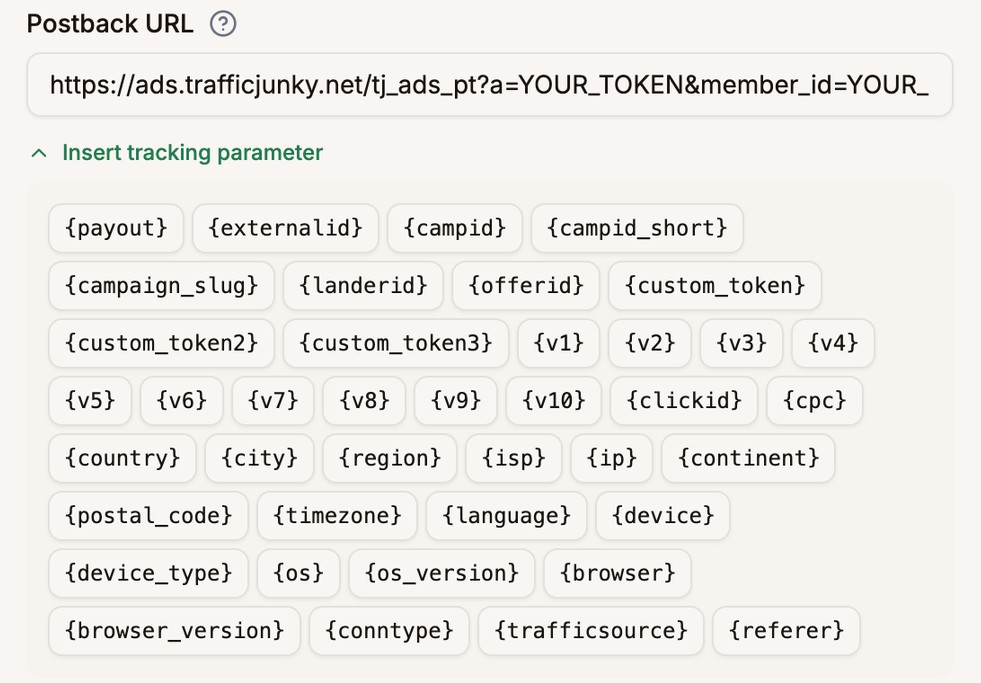
| Placeholder | What it holds |
|---|---|
{payout} | What the conversion was worth |
{externalid} | The traffic source's click ID |
{clickid} | Proferex's click ID |
{cpc} | The cost of the click |
{campid} | Campaign ID |
{campid_short} | Short campaign ID |
{campaign_slug} | Campaign slug |
{landerid} | Lander ID |
{offerid} | Offer ID |
{trafficsource} | Traffic source name |
{v1} to {v10} | The values from your v1 to v10 rows |
{custom_token}, {custom_token2}, {custom_token3} | Your custom tokens. See Default custom token templates |
{country} | Country code |
{region} | Region or state |
{city} | City |
{postal_code} | Postal or ZIP code |
{continent} | Continent code |
{timezone} | Timezone, such as America/New_York |
{language} | Browser language |
{ip} | IP address |
{isp} | Internet provider |
{conntype} | Connection type |
{device} | Device name |
{device_type} | Device type |
{os} | Operating system |
{os_version} | Operating system version |
{browser} | Browser |
{browser_version} | Browser version |
{referer} | The page the visitor came from |
Most traffic sources only need {externalid}, and often {payout}. Only add others if yours asks for them.
Default custom token templates
Open More at the bottom of the form to find Default Custom Token Templates.
A custom token is a value Proferex builds for each click from a template you write. You can then send it to your offers and landers, or back to the traffic source.
A template mixes placeholders with your own text. Proferex swaps each placeholder for the click's value and keeps your text exactly as you typed it. Say a click arrives with 48211 in v1 and 9921 in v2:
| Template | Value for that click |
|---|---|
{v1}_{v2} | 48211_9921 |
{v1}-{v2} | 48211-9921 |
exo_{v1} | exo_48211 |
{v1}_{country} | 48211_US |
summer | summer |
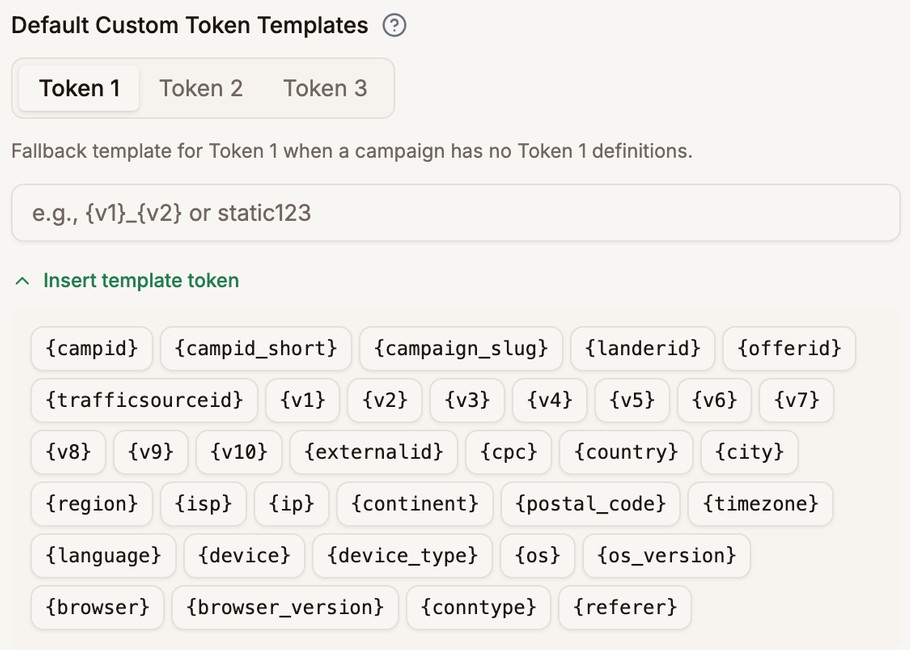
You normally set custom tokens on each campaign. The templates here are a fallback: if a campaign has no Token 1 template, it uses this one. The same goes for Tokens 2 and 3.
Click Insert template token to see every placeholder you can use, such as {v1} to {v10}, {country}, {device}, or {trafficsourceid}. Click one to add it to the template.
To learn more, see Custom Tokens.
See how each one performs
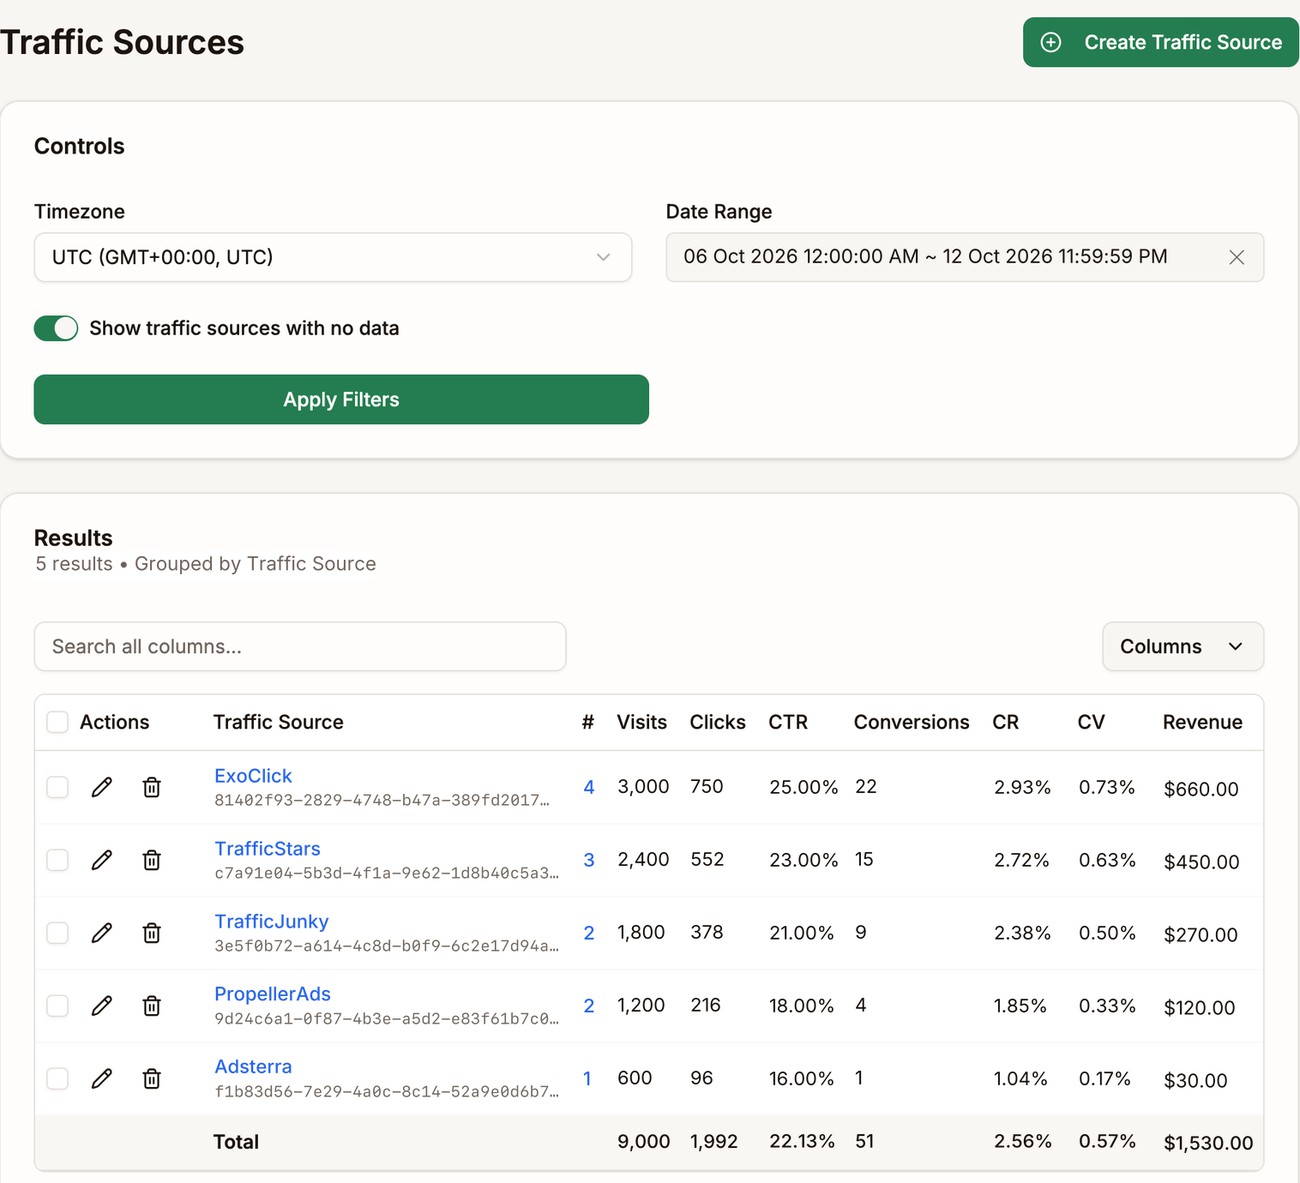
The list shows each traffic source's visits, clicks, conversions, and the rest of your numbers for the date range you pick. Click a name to break its numbers down by campaign, offer, country, and more. See Reading Your Stats and Drill-Downs.
Edit, duplicate, or delete
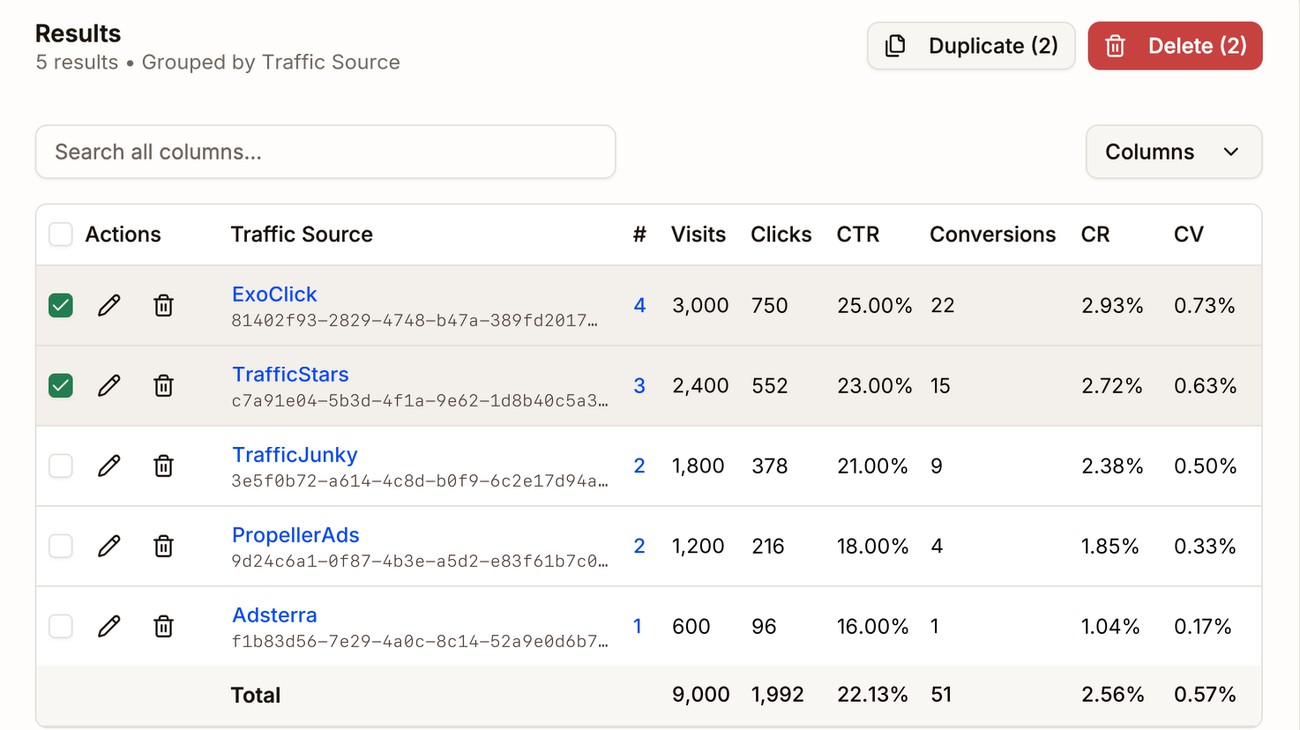
- Edit it with the pencil in its row.
- Delete it with the bin. You can only delete a traffic source once no campaigns use it, so move or delete those campaigns first.
- Tick several rows to work on them together. Duplicate and Delete appear at the top, with the number you picked.
Duplicating is a quick way to add a second account on the same traffic source. The copy keeps every setting except the API Key, and its name ends in (Copy). Rename it and add the API key for the other account.
Next step
Add the affiliate network or advertiser you get your offers from. See Offer Sources.