# Quick Start

> Create a campaign, check that its clicks appear in your reports, and set up conversion postbacks.

Use this guide to create a campaign, check that its clicks appear in your reports, and set up conversion postbacks. Each step links to the chapter with the full details.

To learn what visits, clicks, and conversions mean for your campaigns, read [How Tracking Works](/docs/getting-started/how-tracking-works/index.md).

---

## What your account already has

Every new account comes with two free domains, ready to use:

### Starter tracking domain

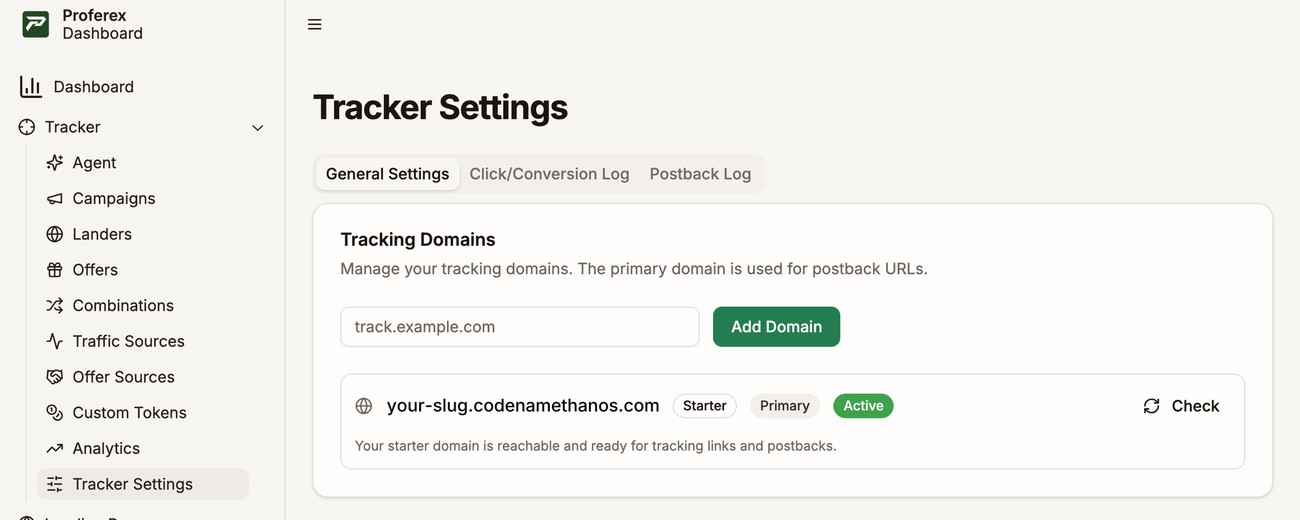
Your starter tracking domain has the form `your-slug.codenamethanos.com`. Campaign links and offer links run on this domain. Find it under **Tracker → Tracker Settings**. See [Tracking Domain](/docs/tracker/tracking-domain/index.md).

![Tracker Settings selected under Tracker in the sidebar, and the starter tracking domain outlined](/images/docs/tracker-settings-nav.jpg "Tracker → Tracker Settings · starter domain")

### Starter page domain

Your starter page domain has the form `your-slug.tryproferex.com`. Landing pages you host in Proferex can be served on this domain. Find it under **Landing Pages → Page Settings**. See [Page Domain](/docs/landing-pages/page-domain/index.md).

![Page Settings selected under Landing Pages in the sidebar, and the starter page domain outlined](/images/docs/page-settings-nav.jpg "Landing Pages → Page Settings · starter domain")

Both domains are fine for testing. For live traffic, add a domain you own.

---

## Step 1 - Add a traffic source

The traffic source is the ad network your visitors come from.

<ol className="manual-illustrated-steps">
  <li>
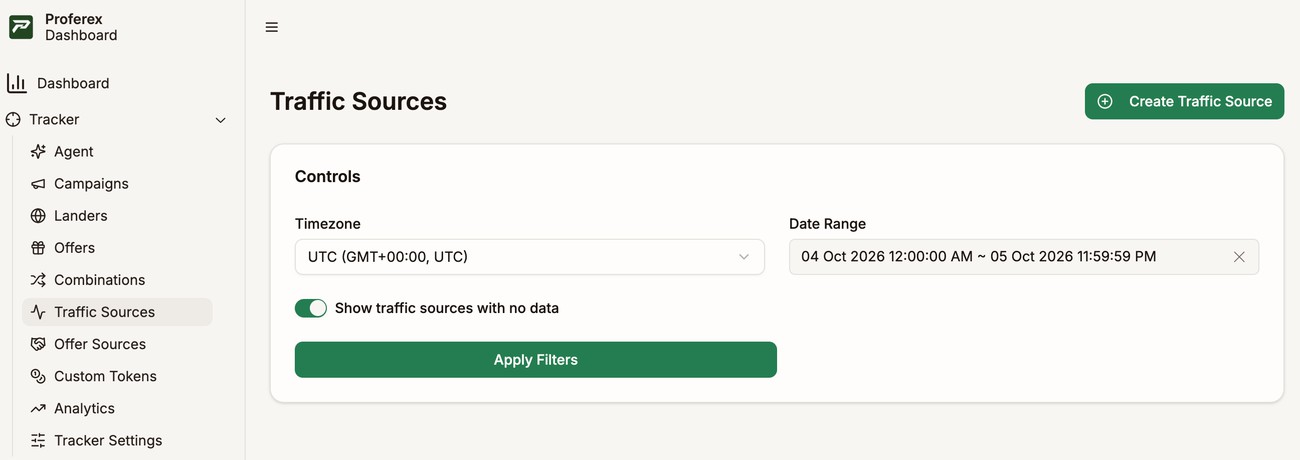
    <p>Go to <strong>Traffic Sources</strong> and click <strong>Create Traffic Source</strong>.</p>
    ![Traffic Sources in the sidebar and the Create Traffic Source button on the Traffic Sources page](/images/docs/quick-start-traffic-source-1.jpg "Create a traffic source")
  </li>
  <li>
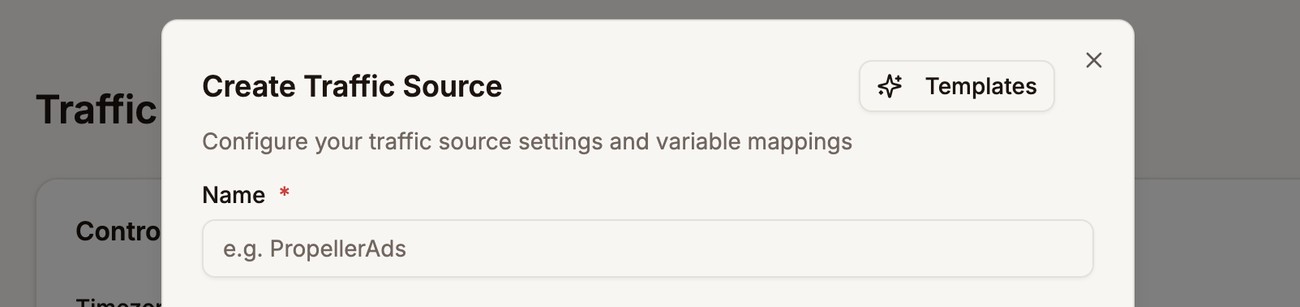
    <p>Click <strong>Templates</strong> and pick your ad network if it is listed.</p>
    ![Templates button in the Create Traffic Source form](/images/docs/quick-start-traffic-source-2.jpg "Choose a network template")
  </li>
  <li>
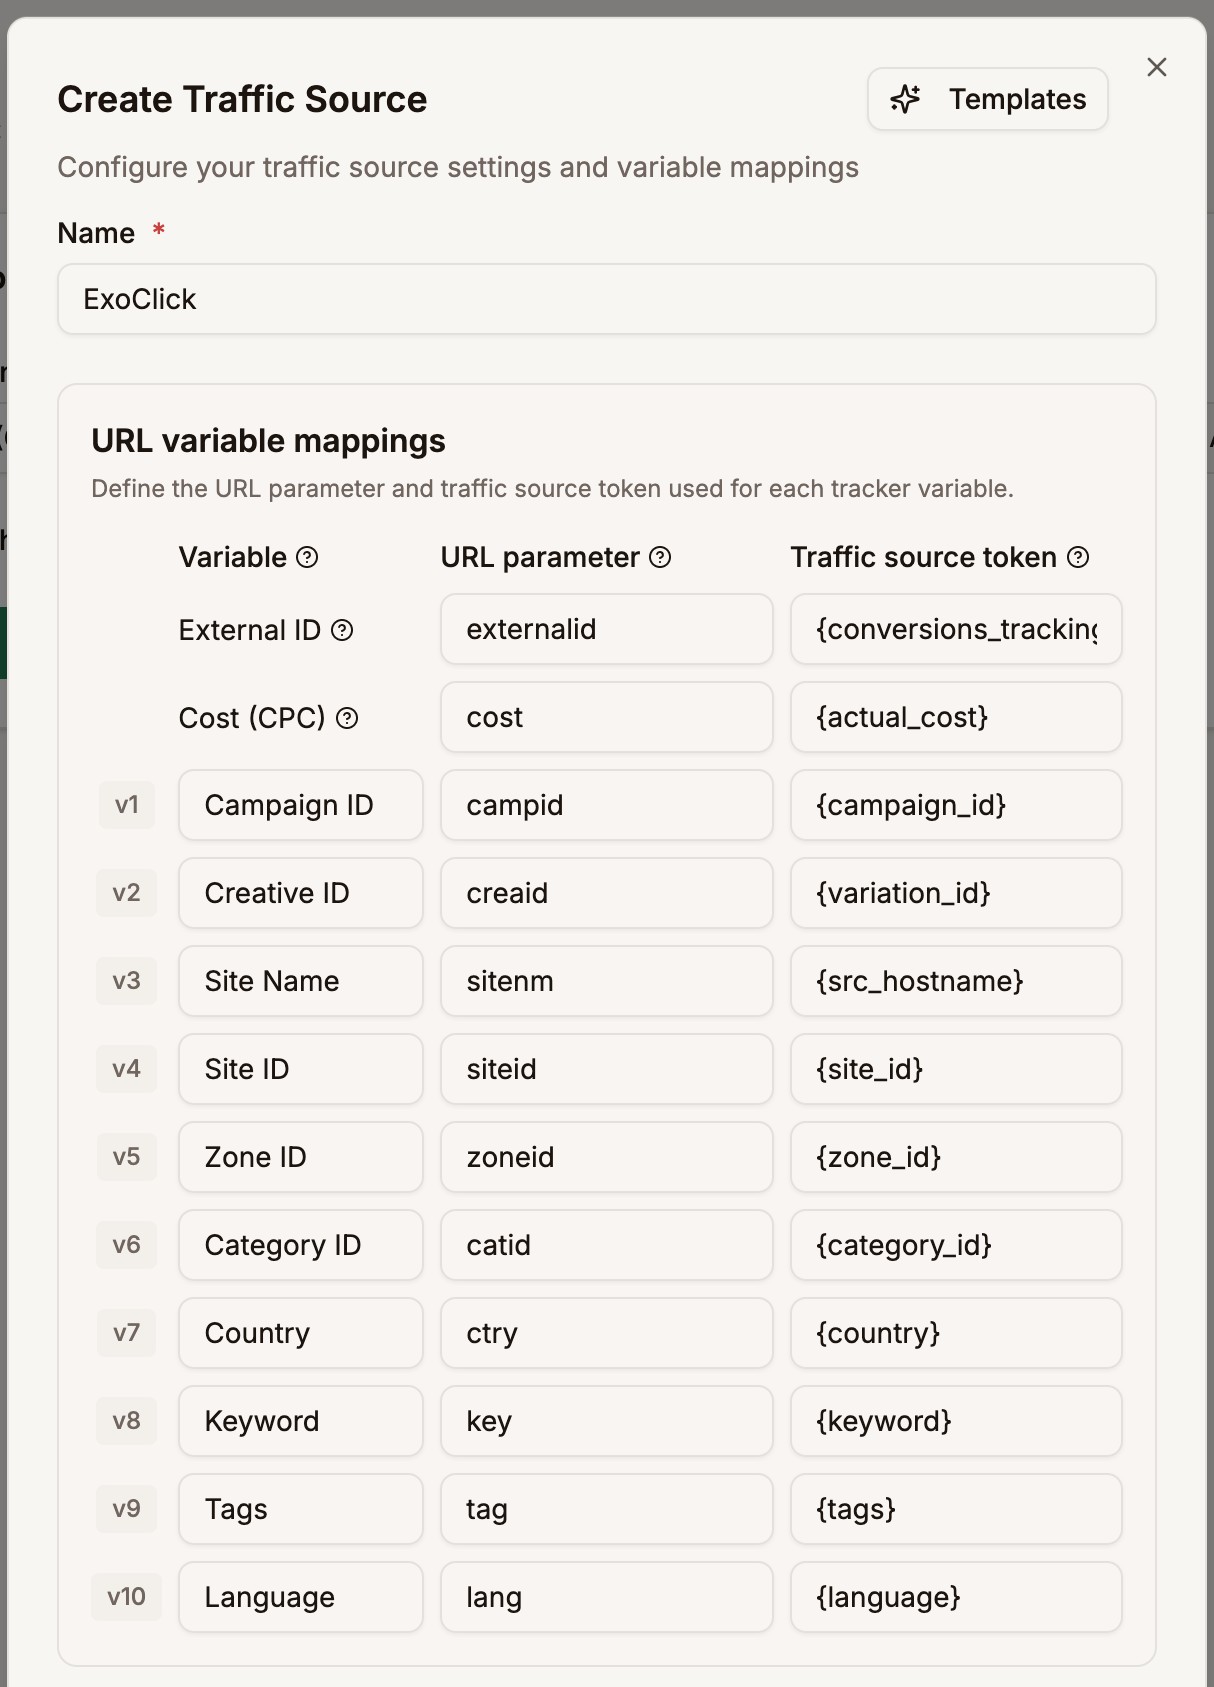
    <p>Check the name and token mappings filled in by the template. If your network is not listed, enter a name and add its tokens by hand.</p>
    ![ExoClick template with a name and URL variable mappings filled in](/images/docs/quick-start-traffic-source-3.jpg "Review the filled token mappings")
  </li>
  <li>
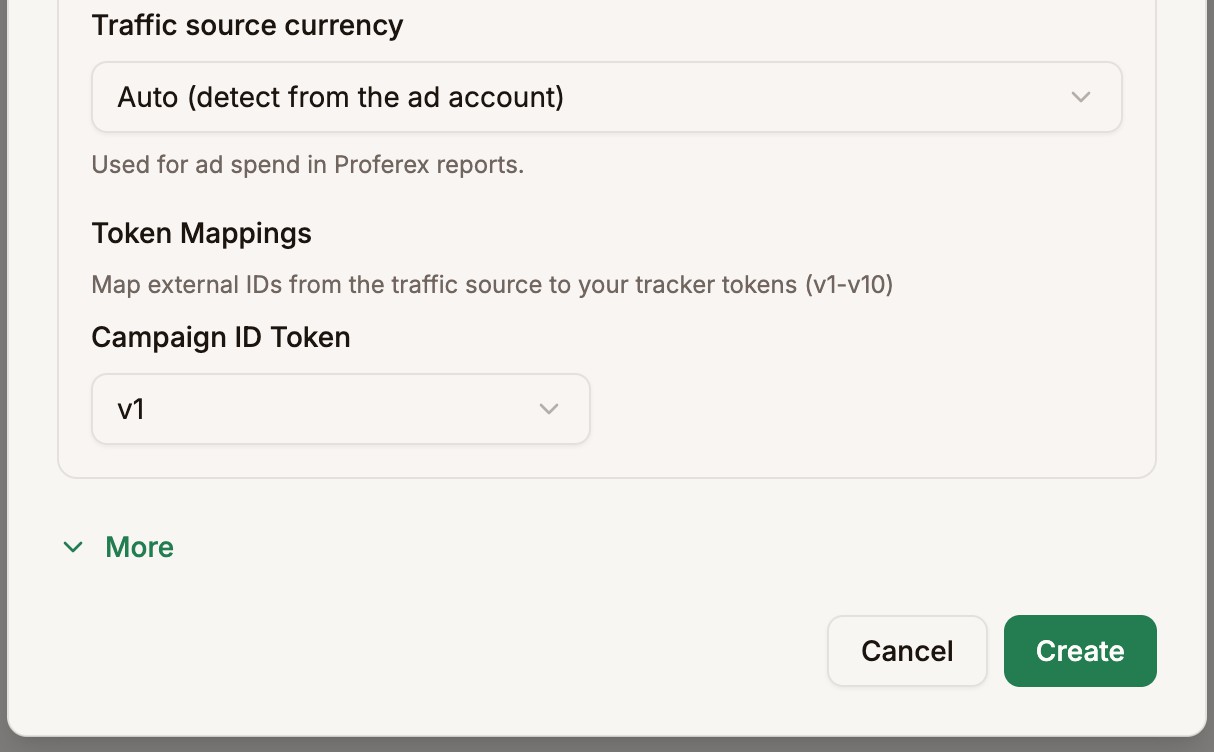
    <p>Scroll to the bottom of the form and click <strong>Create</strong> to save the traffic source.</p>
    ![Cancel and Create buttons at the bottom of the Create Traffic Source form](/images/docs/quick-start-traffic-source-4.jpg "Save the traffic source")
  </li>
</ol>

See [Traffic Sources](/docs/tracker/traffic-sources/index.md).

---

## Step 2 - Add an offer source (optional)

The offer source is the affiliate network your offers come from. Skip this step if you don't use an affiliate network.

<ol className="manual-illustrated-steps">
  <li>
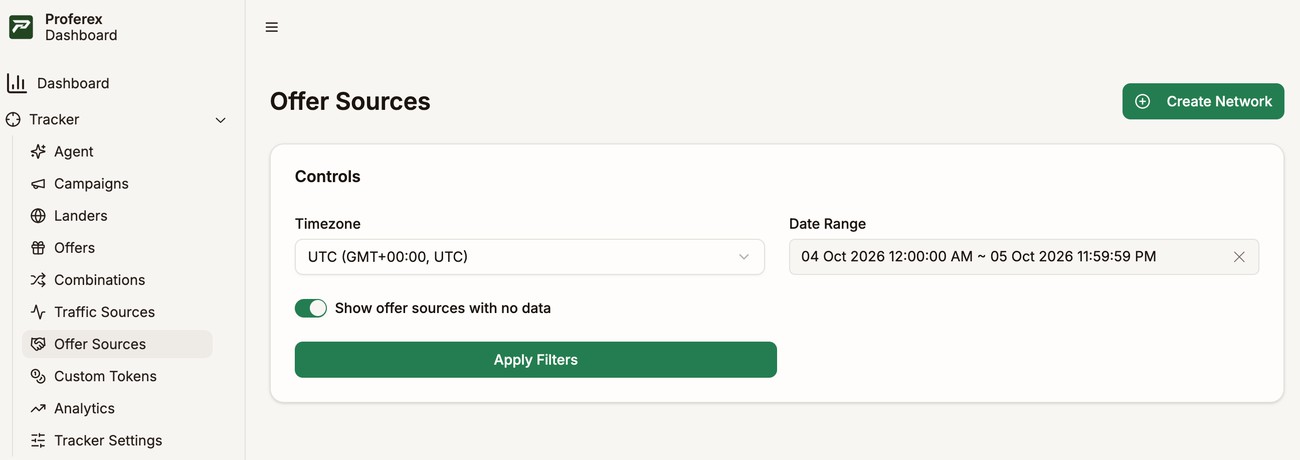
    <p>Go to <strong>Offer Sources</strong> and click <strong>Create Network</strong>.</p>
    ![Offer Sources in the sidebar and the Create Network button on the Offer Sources page](/images/docs/quick-start-offer-source-1.jpg "Create an offer source")
  </li>
  <li>
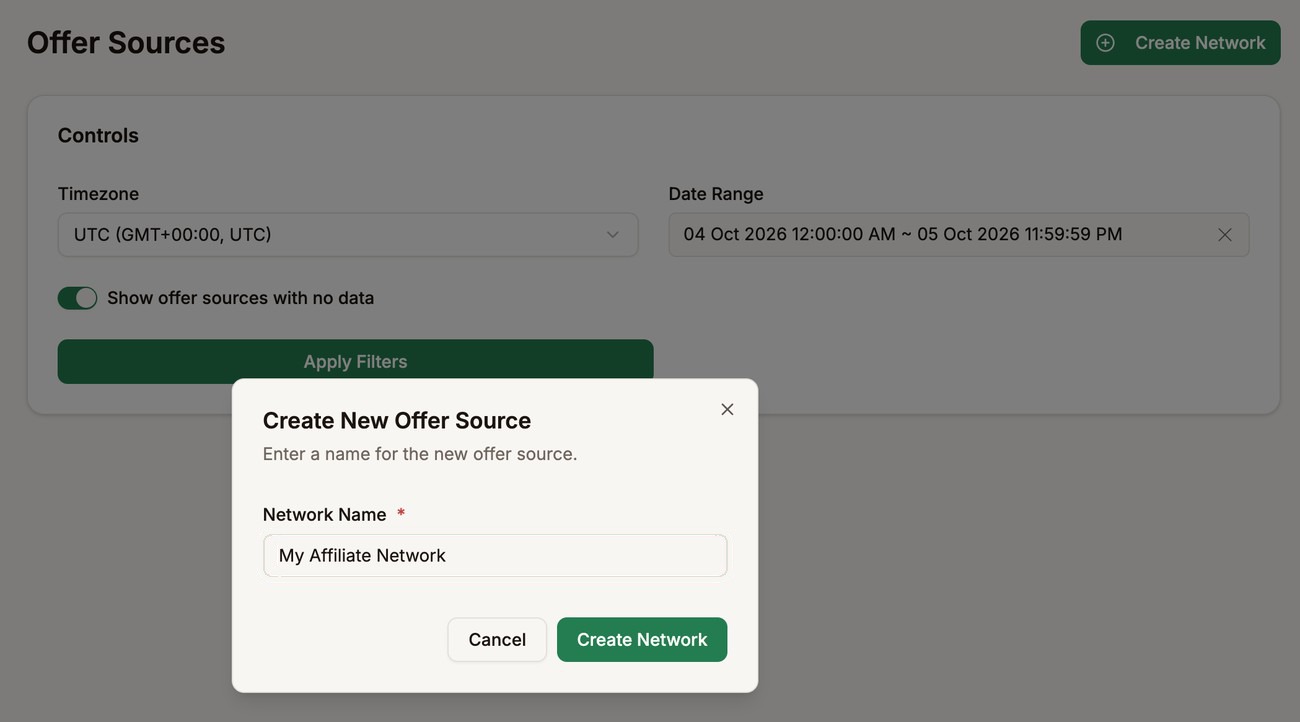
    <p>Enter the name of your affiliate network and click <strong>Create Network</strong>.</p>
    ![Create New Offer Source dialog with My Affiliate Network entered as the network name](/images/docs/quick-start-offer-source-2.jpg "Name the offer source")
  </li>
</ol>

See [Offer Sources](/docs/tracker/offer-sources/index.md).

---

## Step 3 - Add an offer

The offer is where visitors end up.

<ol className="manual-illustrated-steps">
  <li>
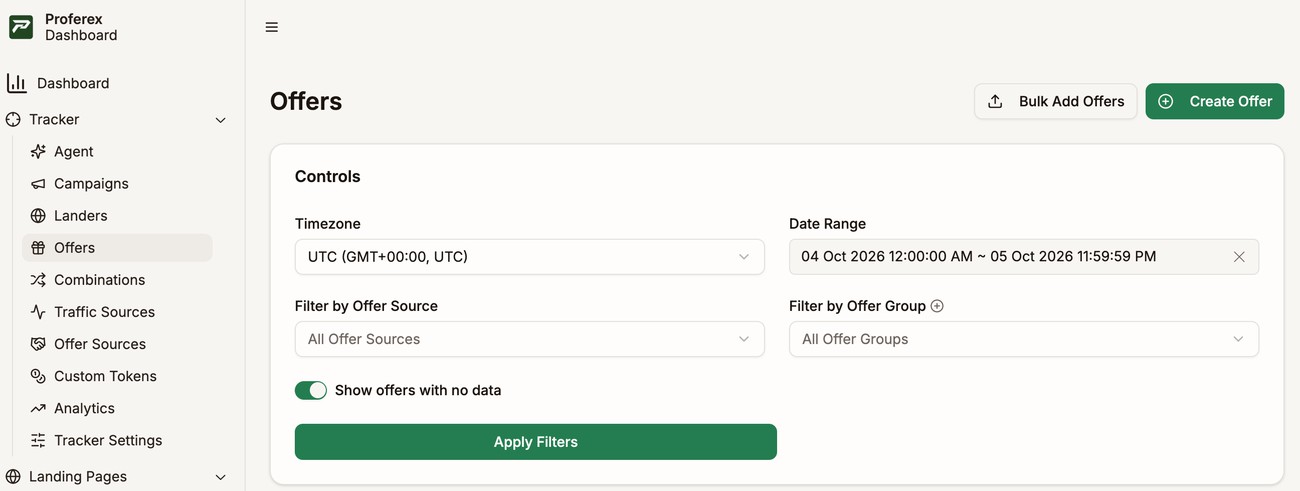
    <p>Go to <strong>Offers</strong> and click <strong>Create Offer</strong>.</p>
    ![Offers in the sidebar and the Create Offer button on the Offers page](/images/docs/quick-start-offers-1.jpg "Create an offer")
  </li>
  <li>
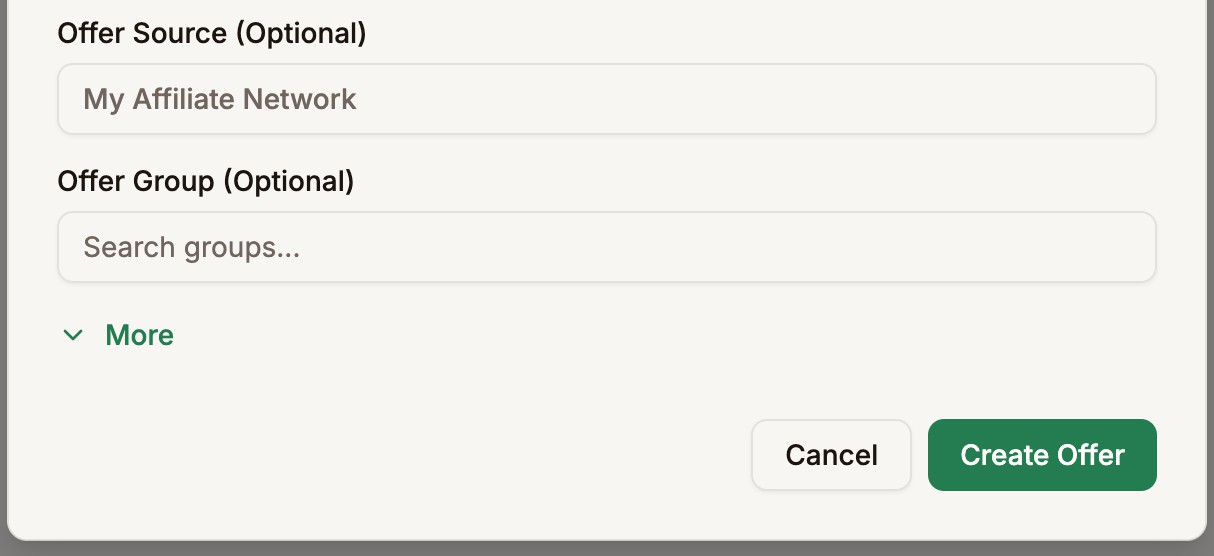
    <p>Enter a name and paste the offer URL from your affiliate network. Add the <code>{'{clickid}'}</code> token in the parameter your network uses for your own click ID, so the click ID comes back in the postback. If you added an offer source in Step 2, select it under <strong>Offer Source</strong>.</p>
    ![Create New Offer form with the name, offer URL with the clickid token, and offer source filled in](/images/docs/quick-start-offers-2.jpg "Fill in the offer details")
  </li>
  <li>
    <p>Click <strong>Create Offer</strong> to save the offer.</p>
    ![Cancel and Create Offer buttons at the bottom of the Create New Offer form](/images/docs/quick-start-offers-3.jpg "Save the offer")
  </li>
</ol>

See [Offers](/docs/tracker/offers/index.md).

---

## Step 4 - Add a lander (optional)

Skip this step to send visitors straight to the offer.

<ol className="manual-illustrated-steps">
  <li>
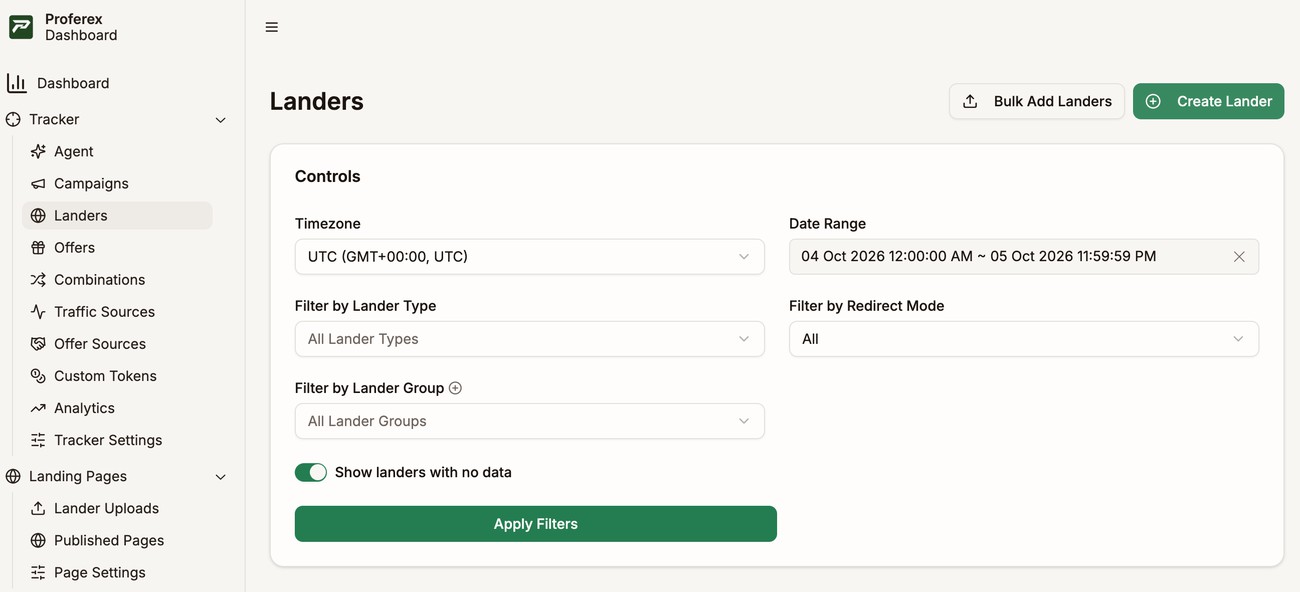
    <p>Go to <strong>Landers</strong> and click <strong>Create Lander</strong>.</p>
    ![Landers in the sidebar and the Create Lander button on the Landers page](/images/docs/quick-start-landers-1.jpg "Create a lander")
  </li>
  <li>
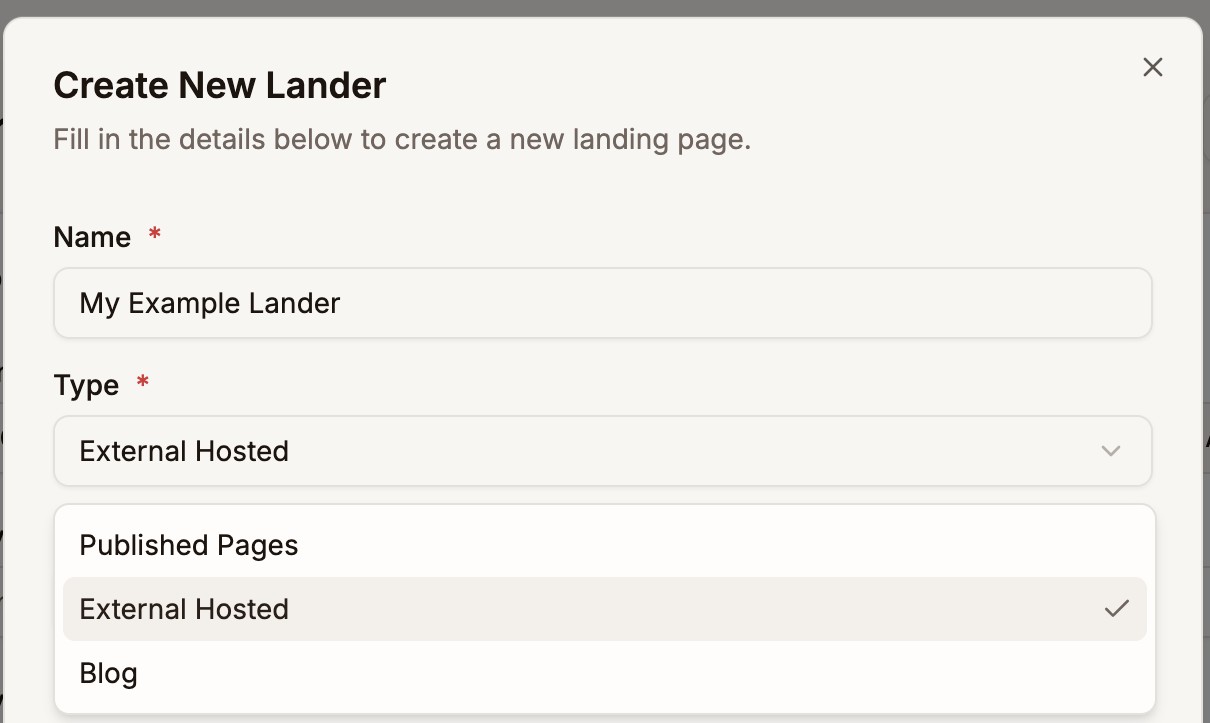
    <p>Enter a name. Under <strong>Type</strong>, choose <strong>External Hosted</strong> if your landing page is hosted somewhere else.</p>
    ![Type dropdown in the Create New Lander form with External Hosted selected](/images/docs/quick-start-landers-2.jpg "Choose the lander type")
  </li>
  <li>
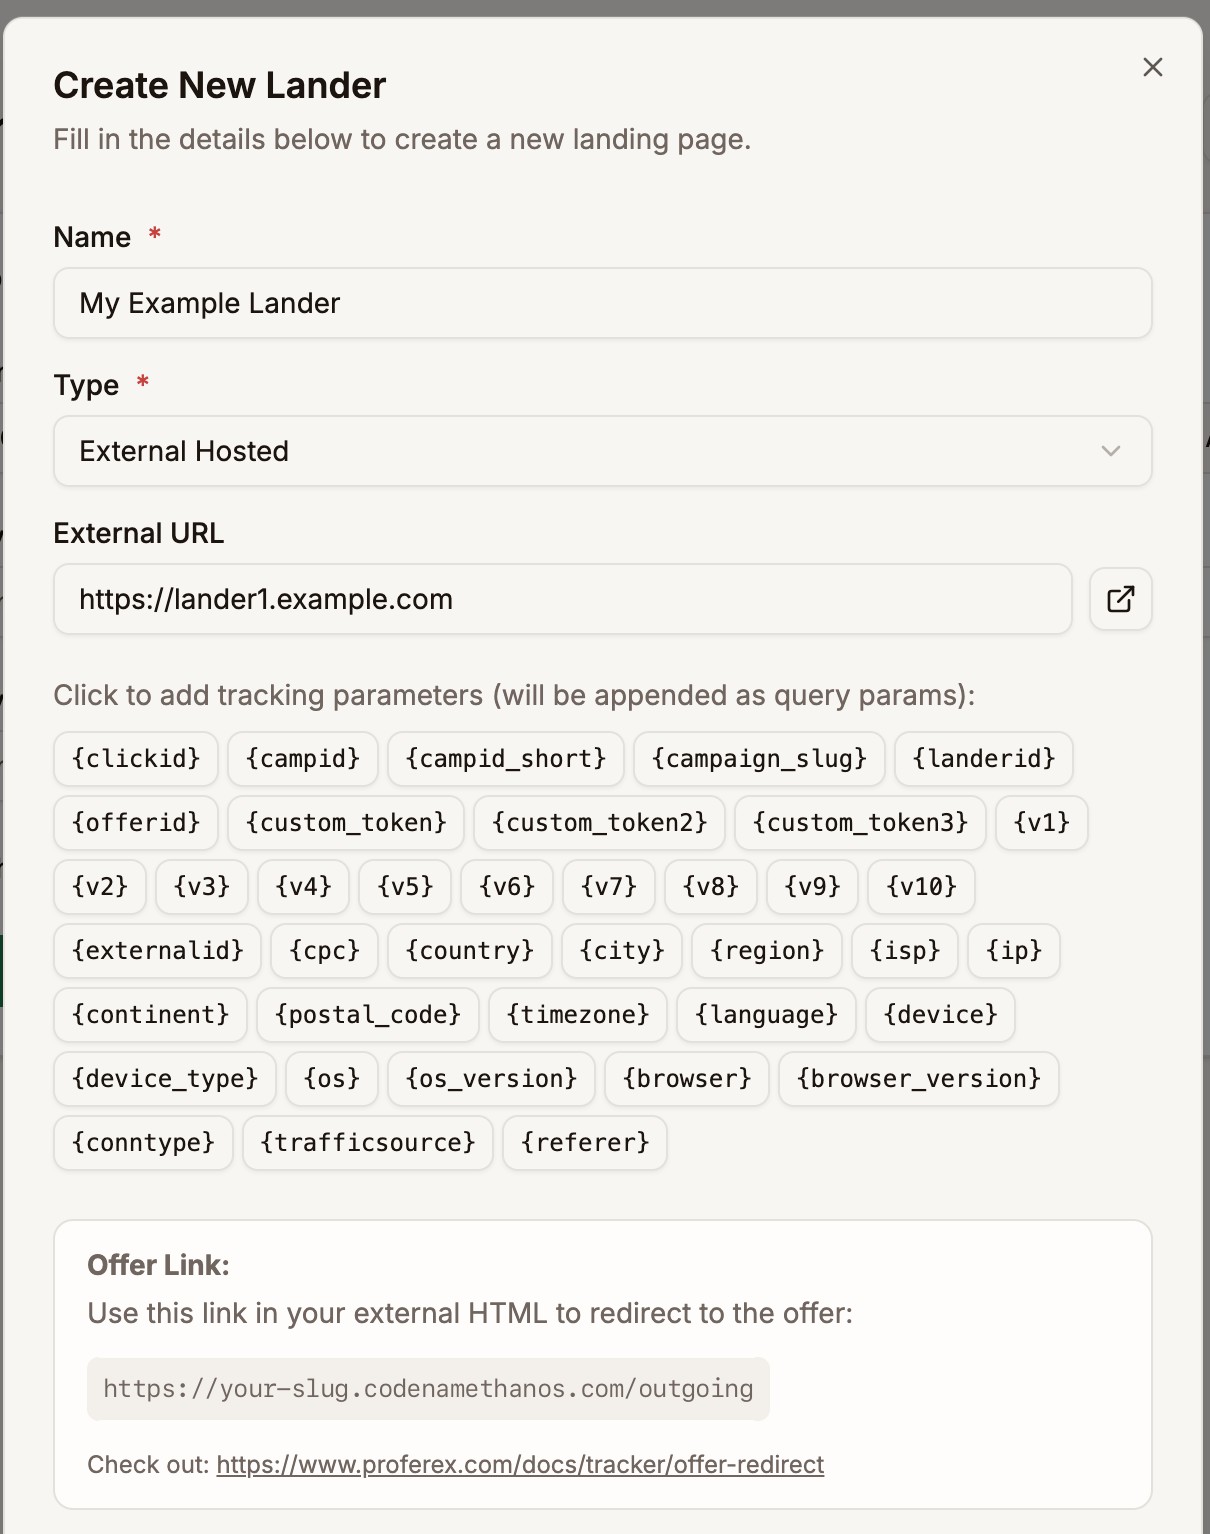
    <p>Paste your landing page address into <strong>External URL</strong>. Then copy the <strong>Offer Link</strong> and use it as the call-to-action link on your landing page. It sends visitors on to the offer.</p>
    ![Create New Lander form with the name, external URL, and offer link outlined](/images/docs/quick-start-landers-3.jpg "Add the page address and copy the offer link")
  </li>
  <li>
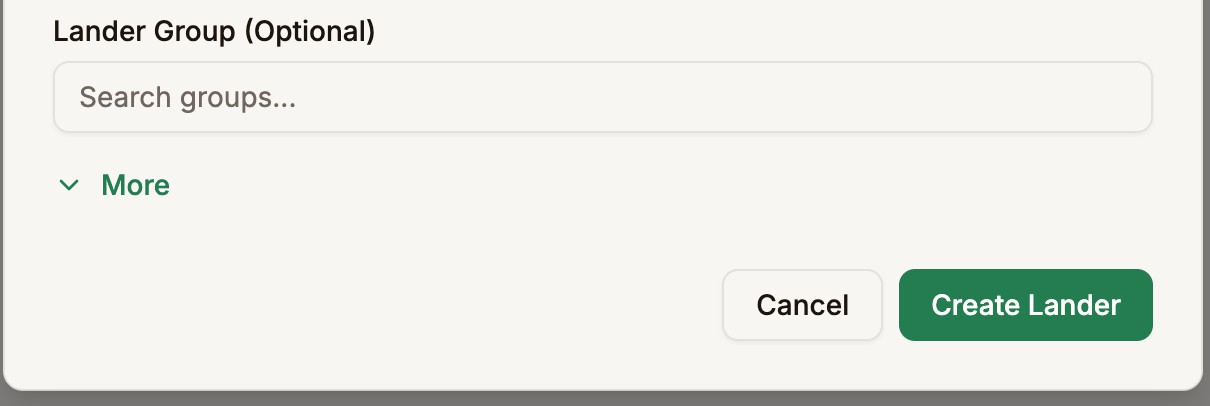
    <p>Click <strong>Create Lander</strong> to save the lander.</p>
    ![Cancel and Create Lander buttons at the bottom of the Create New Lander form](/images/docs/quick-start-landers-4.jpg "Save the lander")
  </li>
</ol>

The call to action on your landing page looks like this:

```html
<a href="https://your-slug.codenamethanos.com/outgoing">Get The Offer</a>
```

If your campaign link and this offer link use different domains, add `tracker.js` to your landing page. See [Add tracker.js](/docs/tracker/offer-redirect/index.md#step-2---add-trackerjs-only-if-needed) for why and how.

See [Landers](/docs/tracker/landers/index.md) and [Offer Redirect](/docs/tracker/offer-redirect/index.md).

---

## Step 5 - Create a combination

A combination decides where visitors go after they click. Each row is a path: a lander followed by an offer, or straight to the offer.

<ol className="manual-illustrated-steps">
  <li>
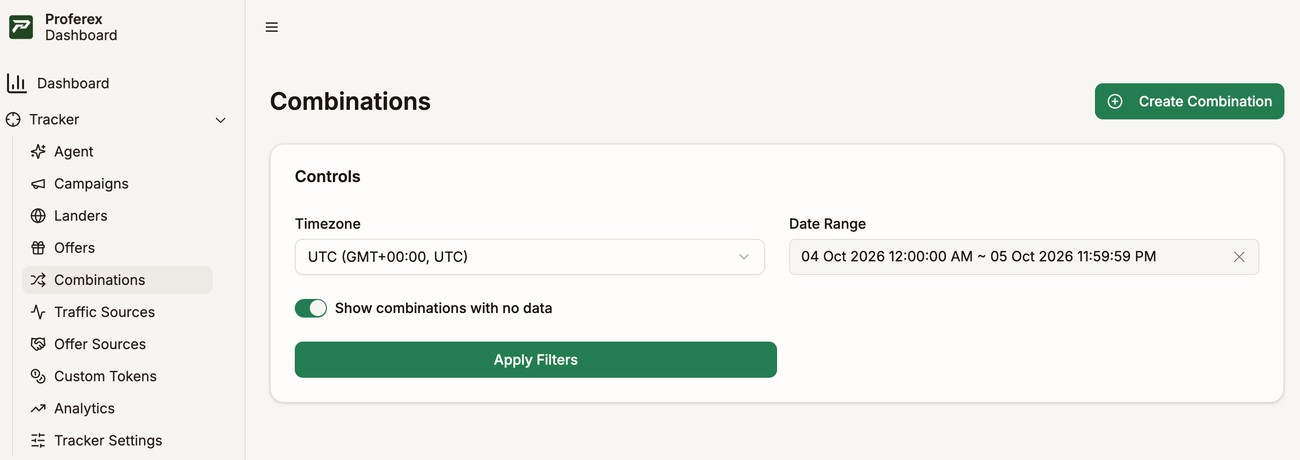
    <p>Go to <strong>Combinations</strong> and click <strong>Create Combination</strong>.</p>
    ![Combinations in the sidebar and the Create Combination button on the Combinations page](/images/docs/quick-start-combination-1.jpg "Create a combination")
  </li>
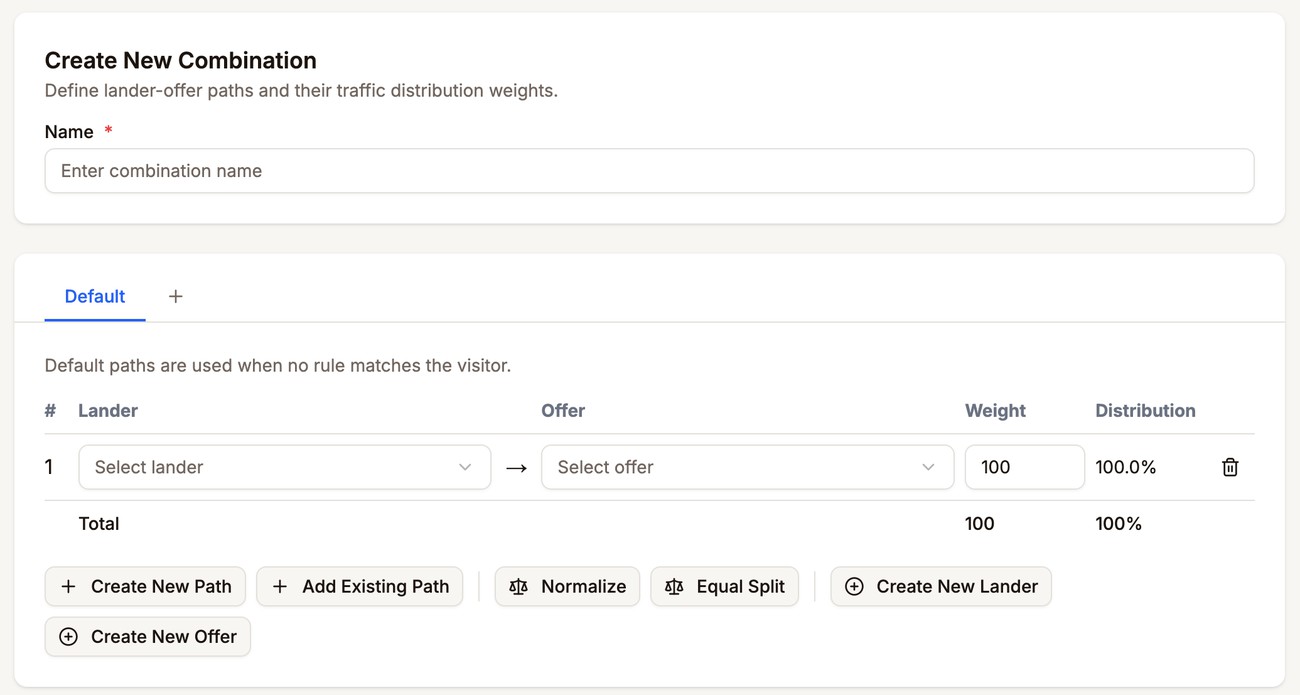
  <li>
    <p>Enter a name. Paths on the <strong>Default</strong> tab are used for every visitor unless a rule matches.</p>
    ![Create New Combination form with the Name field and the Default tab outlined](/images/docs/quick-start-combination-2.jpg "Name the combination")
  </li>
  <li>
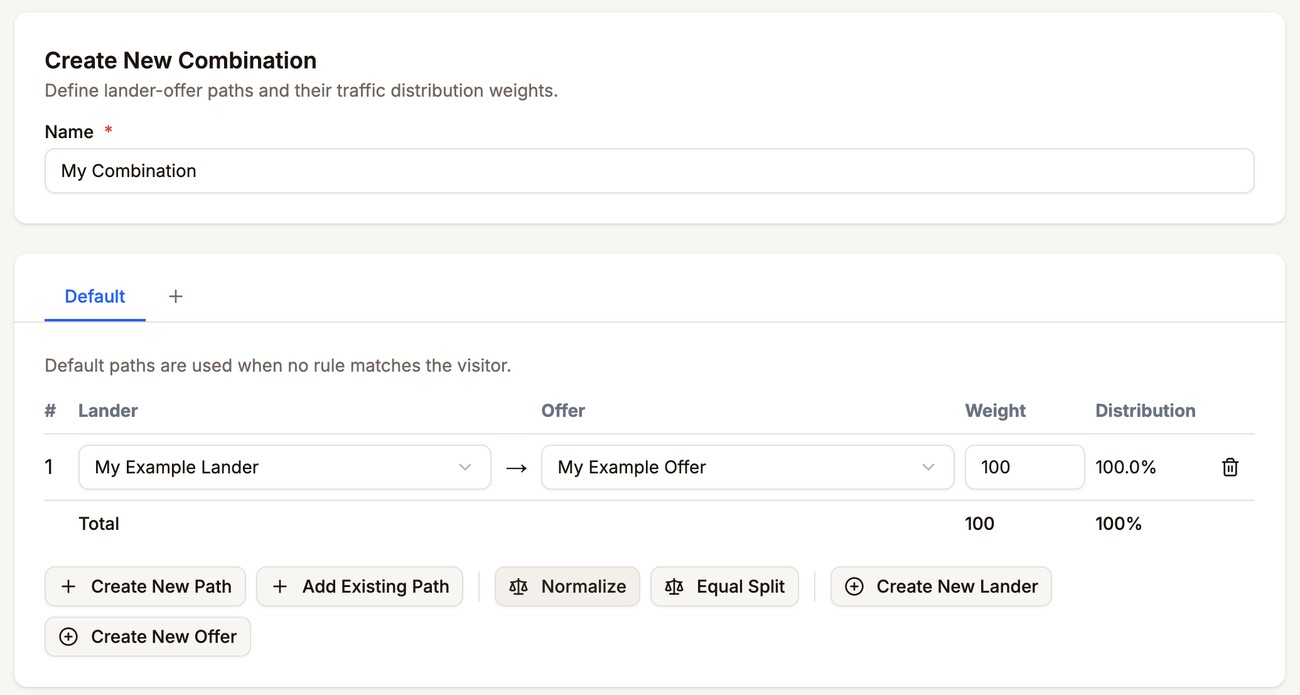
    <p>In path 1, select the lander from Step 4 and the offer from Step 3.</p>
    ![Path 1 with My Example Lander and My Example Offer selected](/images/docs/quick-start-combination-4.jpg "Pick the lander and offer")
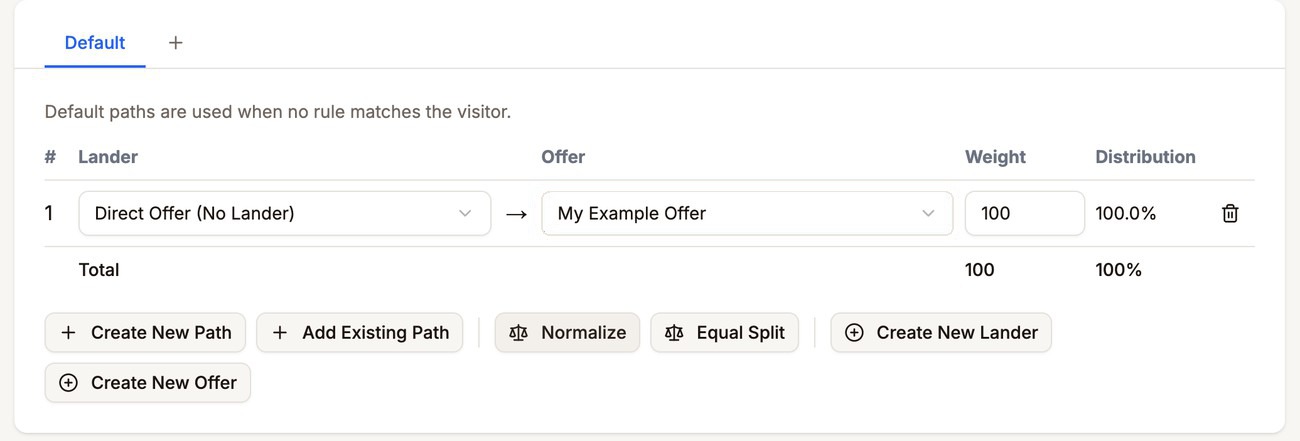
    <p>If you skipped Step 4, select <strong>Direct Offer (No Lander)</strong> as the lander. Visitors then go straight to the offer.</p>
    ![Path 1 with Direct Offer (No Lander) selected as the lander](/images/docs/quick-start-combination-3.jpg "Send visitors straight to the offer")
  </li>
  <li>
    <p>Use the buttons under the paths to change them:</p>
    ![Path buttons: Create New Path, Add Existing Path, Normalize, Equal Split, Create New Lander, Create New Offer](/images/docs/quick-start-combination-8.jpg "Path buttons")
    <ul>
      <li><strong>Create New Path</strong> adds an empty row.</li>
      <li><strong>Add Existing Path</strong> copies a path from another combination.</li>
      <li><strong>Normalize</strong> rescales the weights so they add up to 100.</li>
      <li><strong>Equal Split</strong> gives every path the same weight.</li>
      <li><strong>Create New Lander</strong> and <strong>Create New Offer</strong> add one without leaving this page.</li>
    </ul>
    <p>With more than one path, <strong>Weight</strong> sets each path's share of the traffic.</p>
  </li>
  <li>
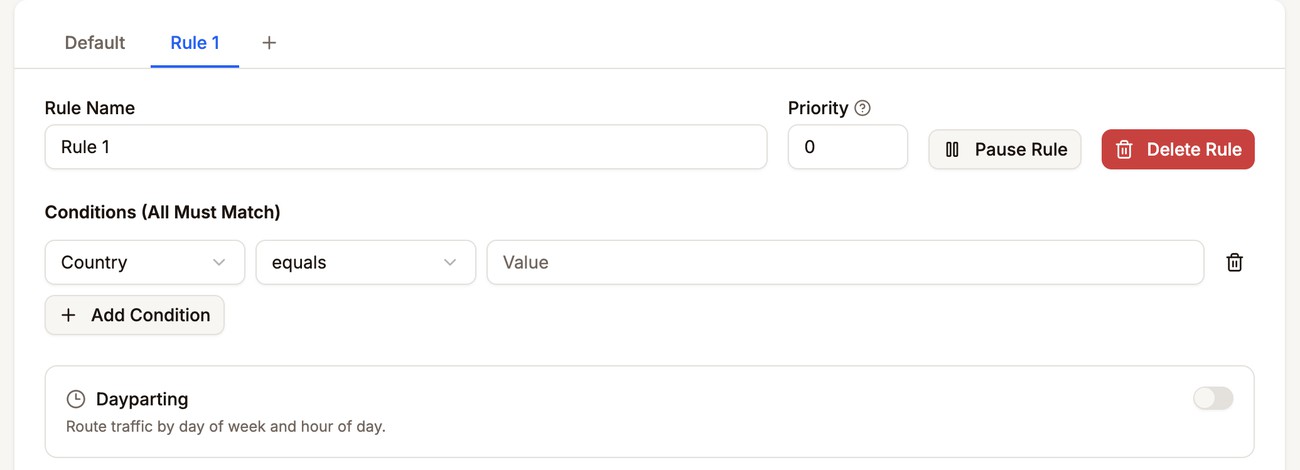
    <p>(Optional) To send some visitors somewhere else, click <strong>+</strong> next to the tabs to add a rule. Set its conditions and give it its own paths.</p>
    ![Rule 1 tab with the add-rule button and the conditions row outlined](/images/docs/quick-start-combination-5.jpg "Add a rule")
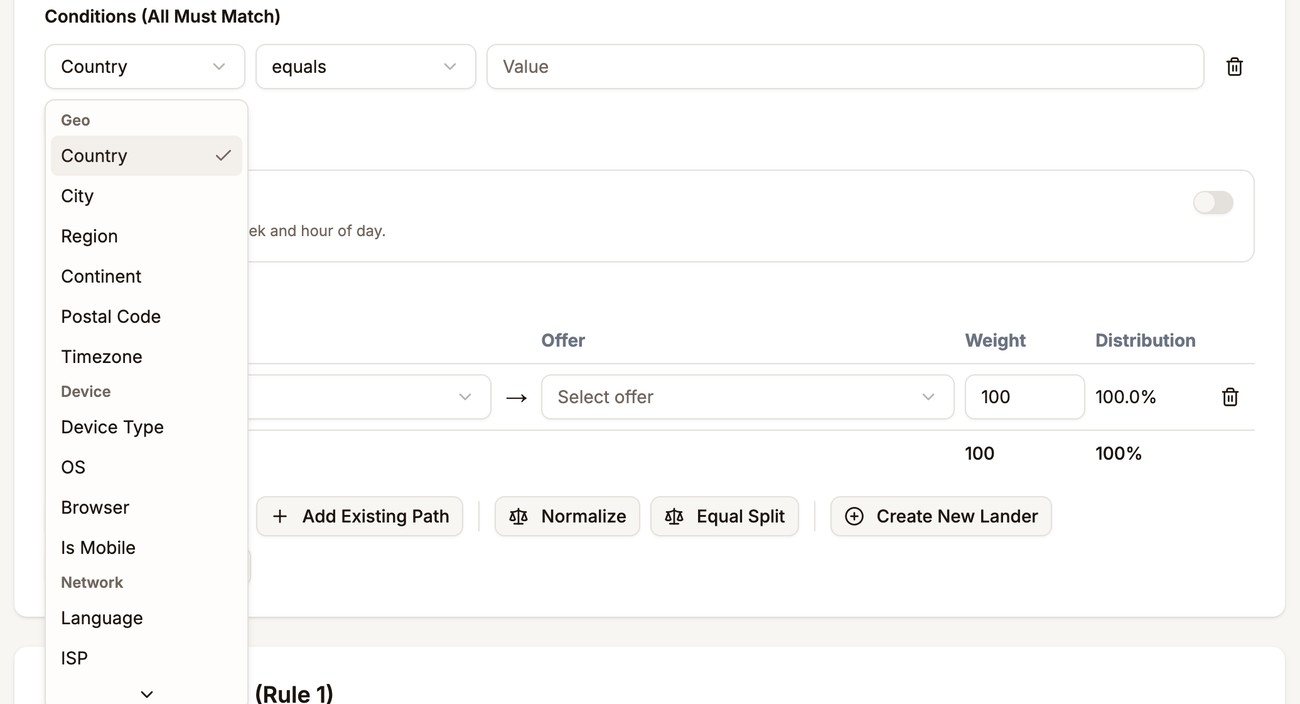
    <p>Conditions can match the visitor's location, device, network and more.</p>
    ![Condition field dropdown showing Geo, Device, and Network options](/images/docs/quick-start-combination-6.jpg "Choose what the rule matches")
  </li>
  <li>
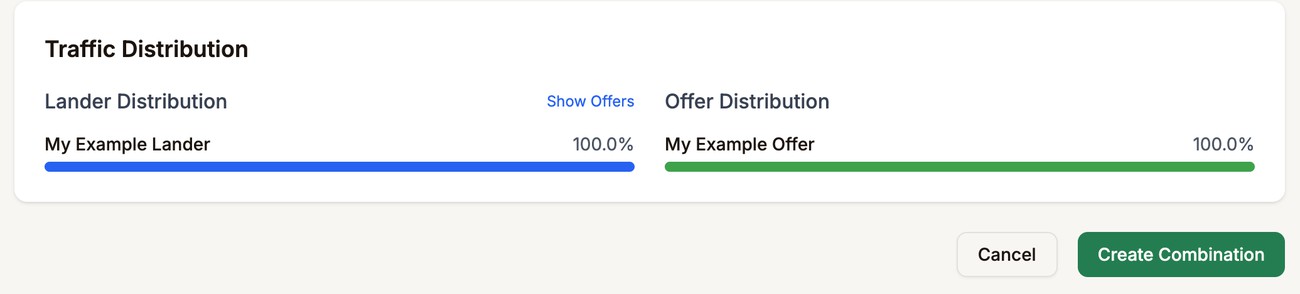
    <p>Check the <strong>Traffic Distribution</strong> and click <strong>Create Combination</strong>.</p>
    ![Traffic Distribution summary and the Create Combination button](/images/docs/quick-start-combination-7.jpg "Save the combination")
  </li>
</ol>

See [Combinations](/docs/tracker/combinations/index.md).

---

## Step 6 - Create a campaign

A campaign is the link you put in your ad. It ties the traffic source to the combination.

<ol className="manual-illustrated-steps">
  <li>
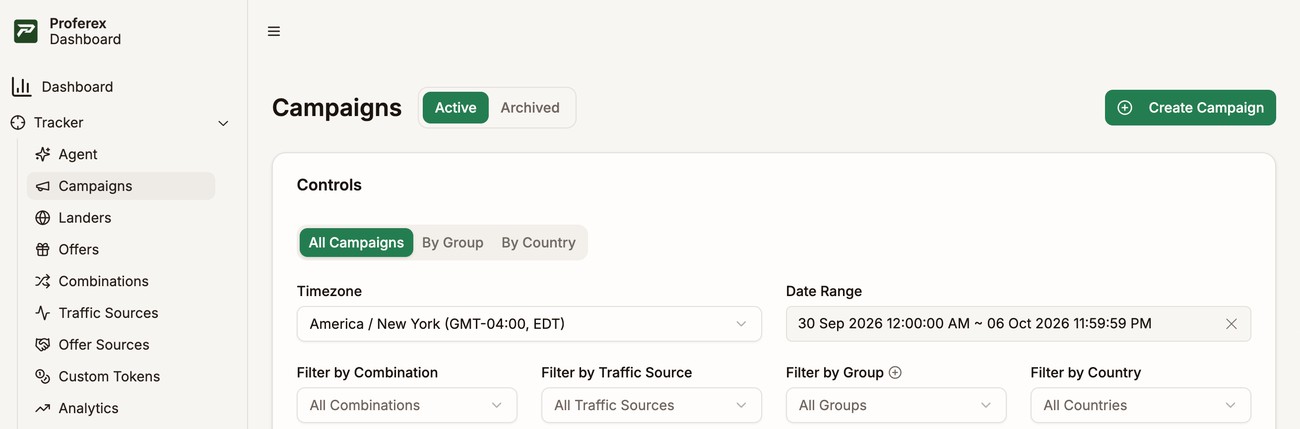
    <p>Go to <strong>Campaigns</strong> and click <strong>Create Campaign</strong>.</p>
    ![Campaigns in the sidebar and the Create Campaign button on the Campaigns page](/images/docs/quick-start-campaign-1.jpg "Create a campaign")
  </li>
  <li>
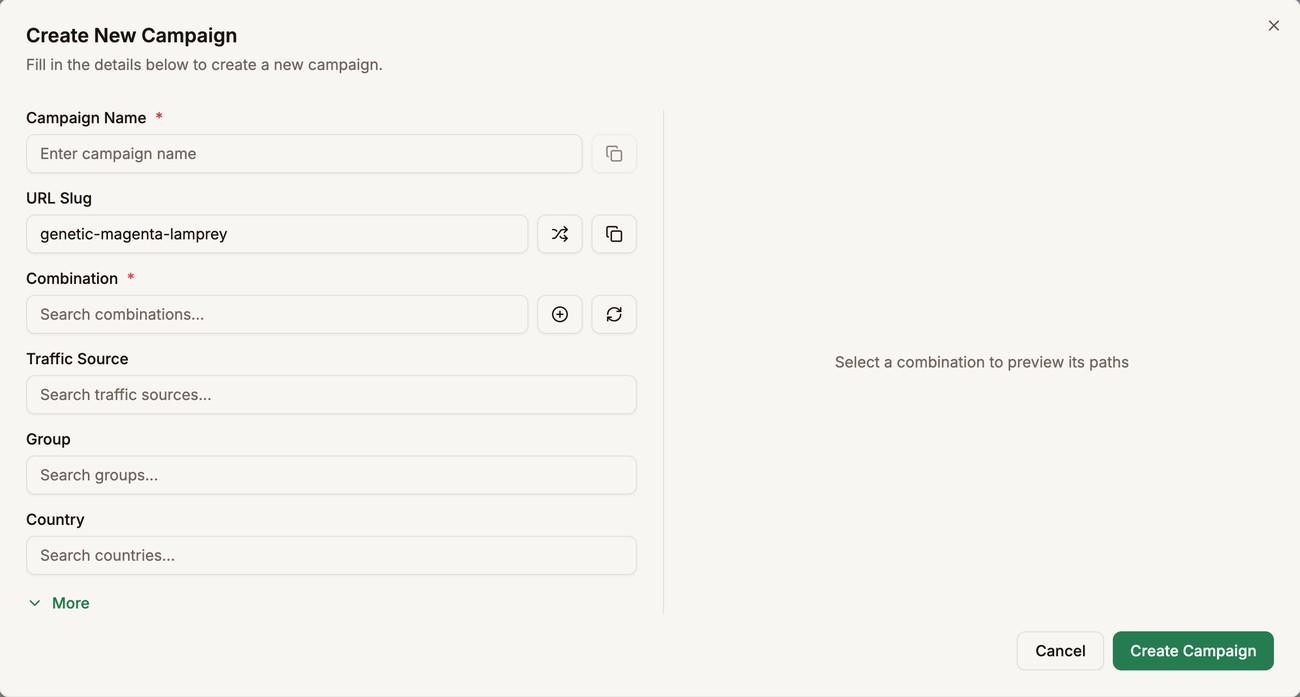
    <p>Enter a <strong>Campaign Name</strong>. The <strong>URL Slug</strong> is filled in for you and becomes part of the campaign link. Type your own or click the shuffle button for a new one.</p>
    ![Create New Campaign form with the Campaign Name field outlined](/images/docs/quick-start-campaign-2.jpg "Name the campaign")
  </li>
  <li>
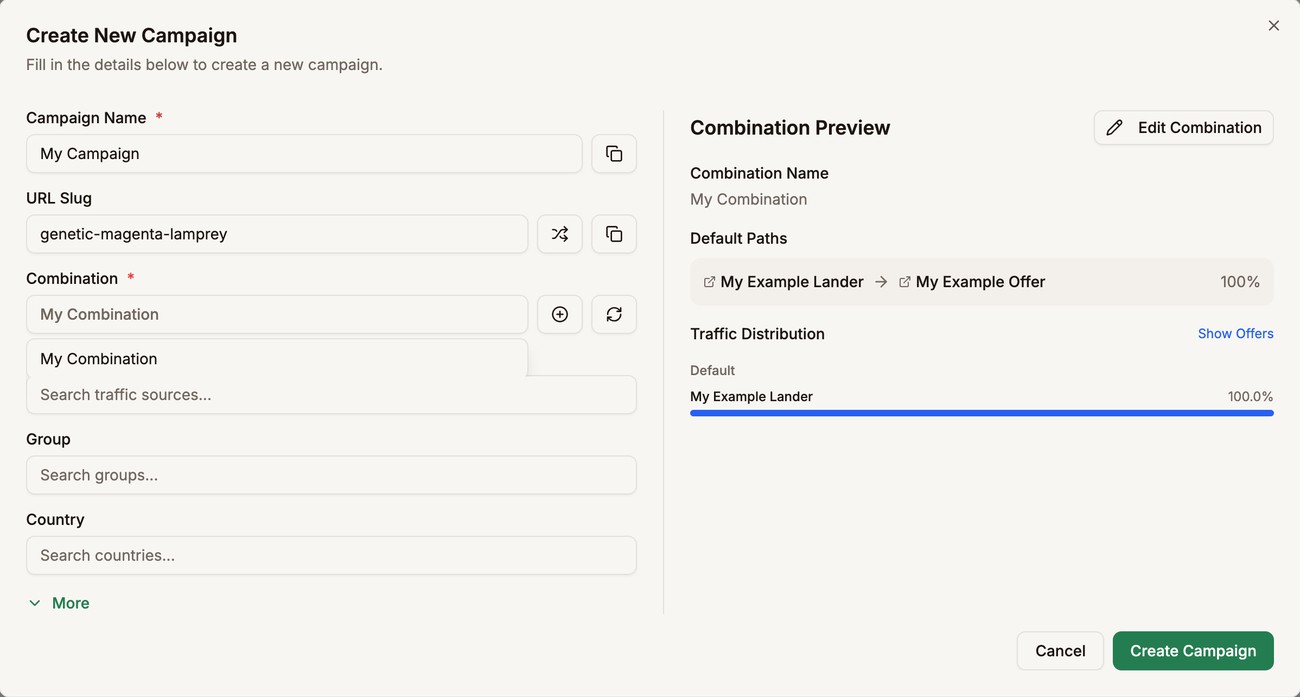
    <p>In <strong>Combination</strong>, select the combination from Step 5. The <strong>Combination Preview</strong> shows where visitors will go.</p>
    ![My Combination selected, with the Combination Preview showing My Example Lander to My Example Offer at 100%](/images/docs/quick-start-campaign-3.jpg "Choose the combination")
  </li>
  <li>
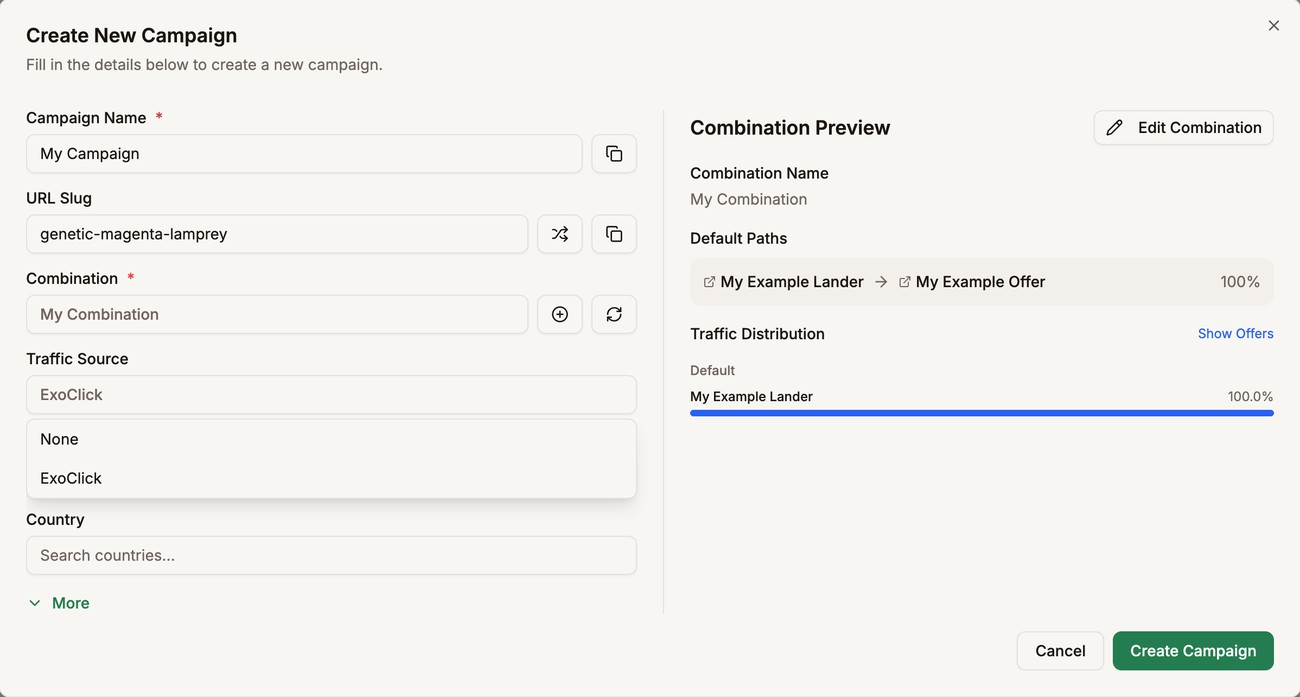
    <p>In <strong>Traffic Source</strong>, select the traffic source from Step 1. Its tokens are added to the campaign link for you.</p>
    ![Traffic Source dropdown open with ExoClick listed](/images/docs/quick-start-campaign-4.jpg "Choose the traffic source")
  </li>
  <li>
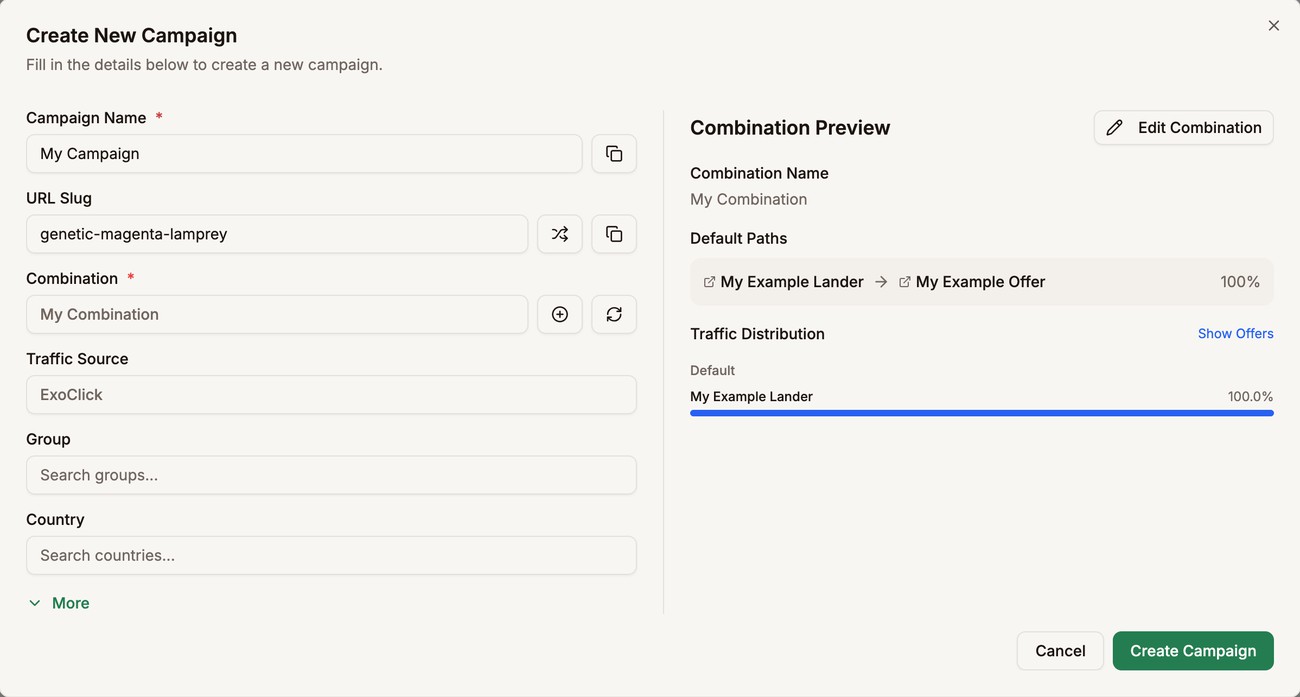
    <p>Click <strong>Create Campaign</strong>.</p>
    ![Completed campaign form with the Create Campaign button outlined](/images/docs/quick-start-campaign-5.jpg "Save the campaign")
  </li>
  <li>
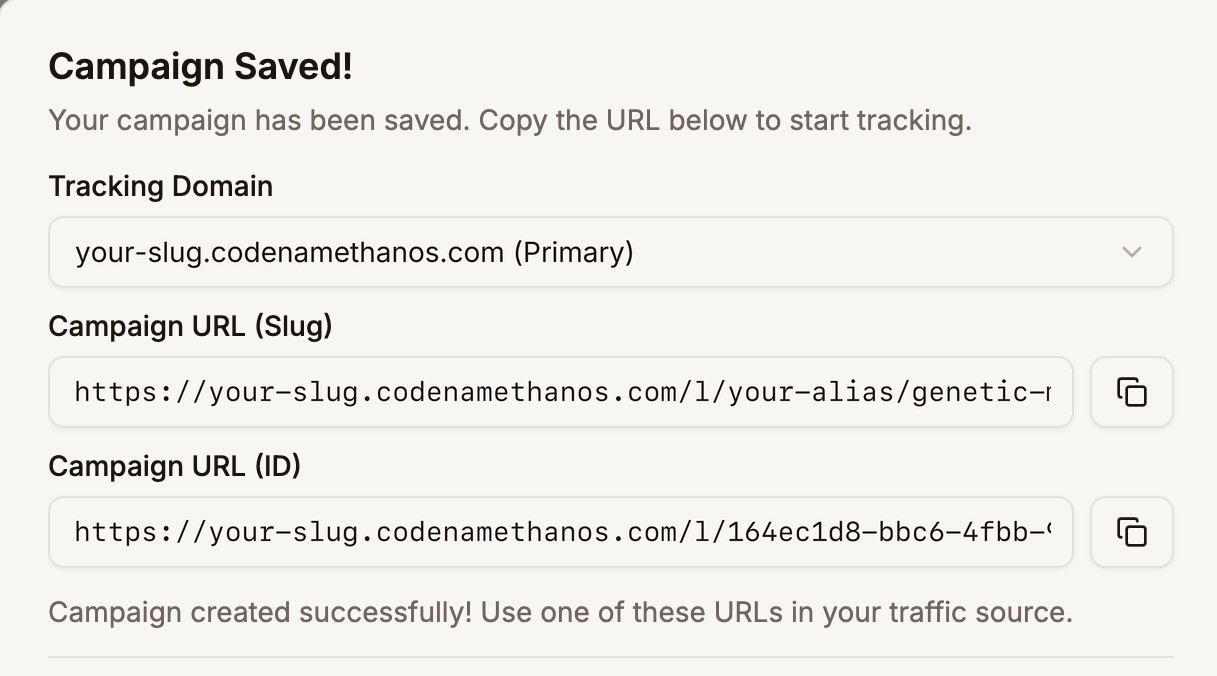
    <p>The campaign links appear at the top of the form. Choose the <strong>Tracking Domain</strong> the links should use, then copy either <strong>Campaign URL</strong>. Both track the same way.</p>
    ![Campaign Saved with the Tracking Domain your-slug.codenamethanos.com and both campaign URLs outlined](/images/docs/quick-start-campaign-6.jpg "Copy the campaign URL")
  </li>
</ol>

**Group**, **Country**, and the settings under **More** are optional. See [Campaigns](/docs/tracker/campaigns/index.md).

---

## Step 7 - Test the campaign link

<ol className="manual-illustrated-steps">
  <li>
    <p>Open the Campaign URL from Step 6 in a private browser window.</p>
  </li>
  <li>
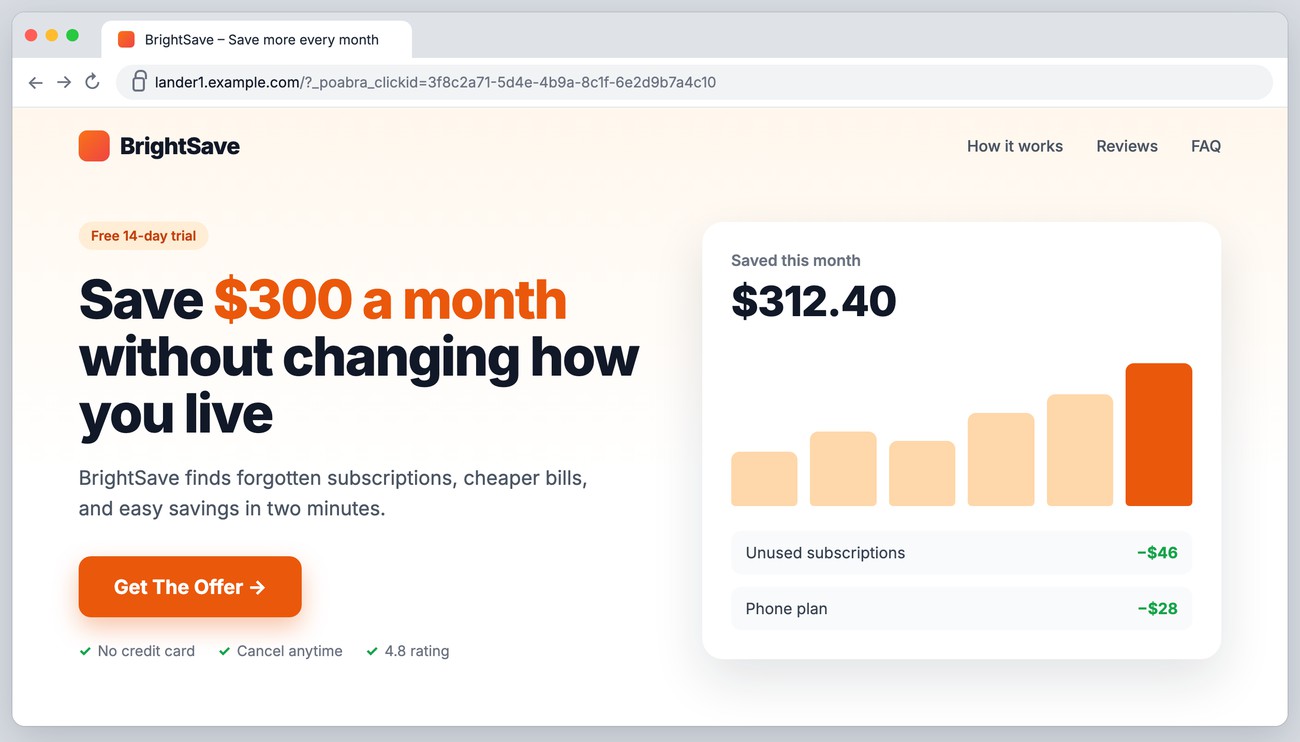
    <p>Check that you land on your lander or offer. A lander opens at its own address with a click ID added to the end.</p>
    ![Example landing page open in a browser, with the click ID in the address bar and a Get The Offer button](/images/docs/quick-start-test-1.jpg "The lander opens with the click ID")
  </li>
  <li>
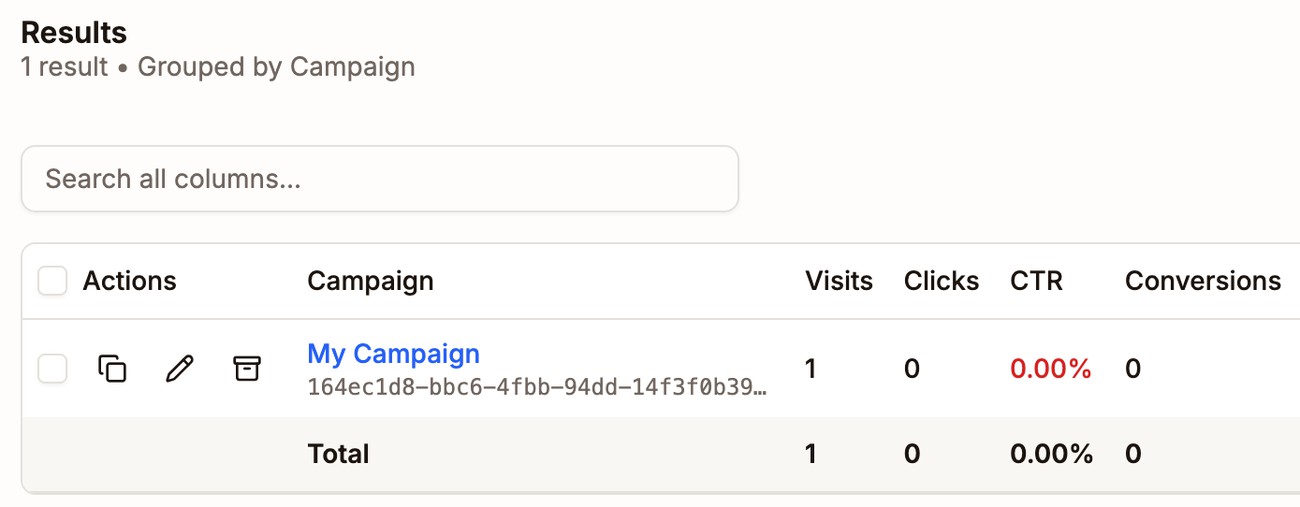
    <p>Go to <strong>Campaigns</strong>. Within a minute, your campaign shows 1 under <strong>Visits</strong>. A visit is someone opening the campaign link.</p>
    ![Campaigns results with My Campaign showing 1 visit and 0 clicks](/images/docs/quick-start-test-2.jpg "The visit is recorded")
    <p>If the campaign is missing, check that the <strong>Date Range</strong> includes today.</p>
  </li>
  <li>
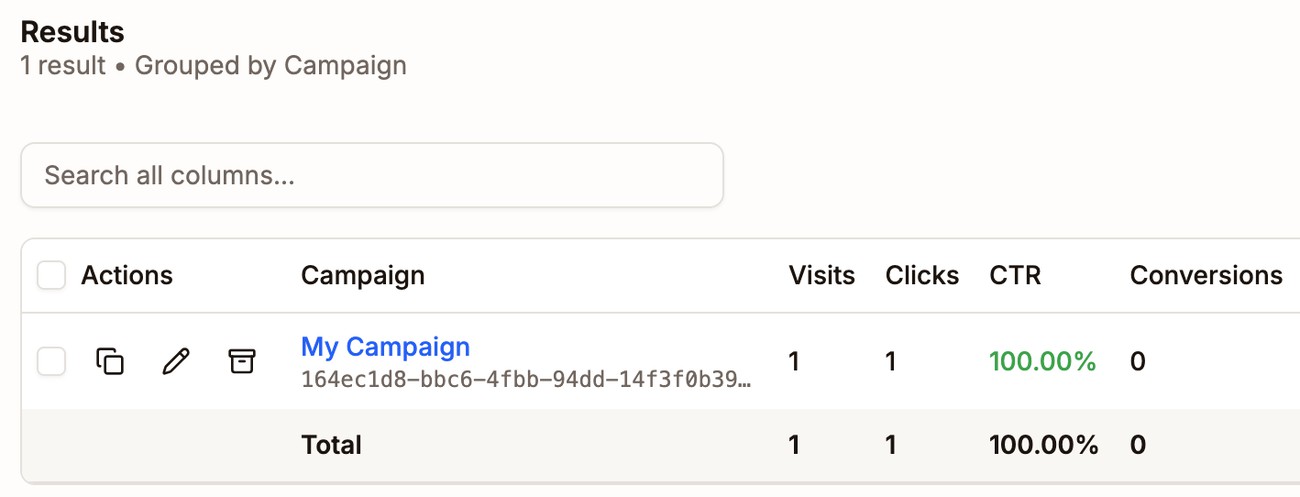
    <p>If you added a lander, click its call to action and check that it opens the offer. Within a minute, <strong>Clicks</strong> shows 1. A click is someone going from your lander to the offer.</p>
    ![Campaigns results with My Campaign showing 1 visit, 1 click, and a CTR of 100%](/images/docs/quick-start-test-3.jpg "The click is recorded")
    <p>Visitors on a Direct Offer path go straight to the offer, so they show as visits only.</p>
  </li>
</ol>

Put the Campaign URL in your ad once the test works.

---

## Step 8 - Set up the postback

Conversions only appear once your affiliate network tells Proferex about them.

<ol className="manual-illustrated-steps">
  <li>
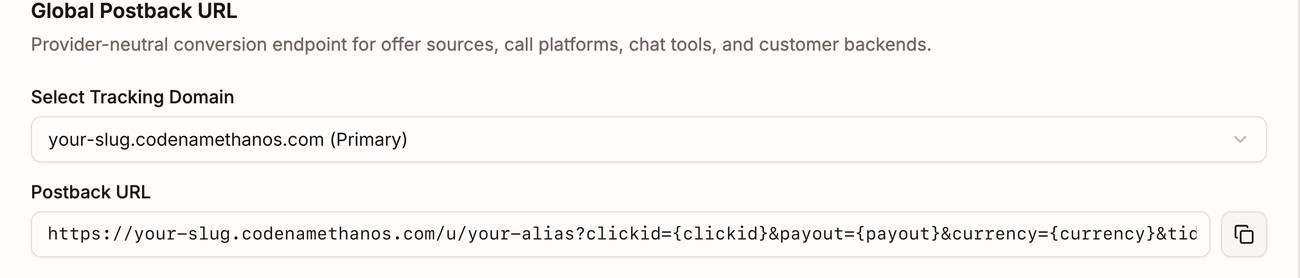
    <p>Go to <strong>Tracker Settings</strong>. On the <strong>General Settings</strong> tab, find <strong>Global Postback URL</strong>.</p>
    ![Tracker Settings selected under Tracker in the sidebar, and the General Settings tab outlined](/images/docs/tracker-settings-nav.jpg "Tracker → Tracker Settings")
  </li>
  <li>
    <p>Select your tracking domain and copy the <strong>Postback URL</strong>.</p>
    ![Global Postback URL with the tracking domain your-slug.codenamethanos.com and the Postback URL outlined](/images/docs/quick-start-postback-1.jpg "Copy the postback URL")
  </li>
  <li>
    <p>Paste the Postback URL into your affiliate network&apos;s postback settings. If your network uses its own macros, replace <code>{'{clickid}'}</code> and <code>{'{payout}'}</code> in the Postback URL with the network macros that return your click ID and the payout.</p>
  </li>
  <li>
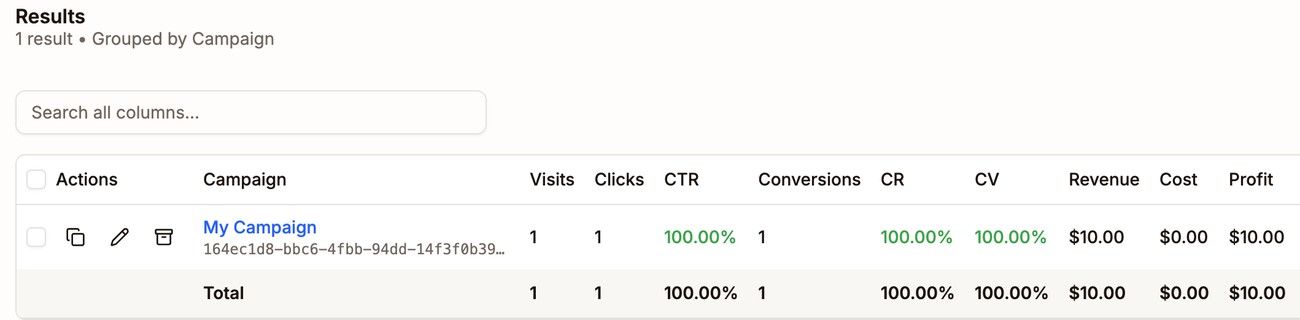
    <p>When a visitor converts, your network sends the postback. Within a minute, the campaign shows the conversion under <strong>Conversions</strong> and the payout under <strong>Revenue</strong>.</p>
    ![Campaigns results with My Campaign showing 1 conversion and $10.00 revenue](/images/docs/quick-start-postback-2.jpg "The conversion is recorded")
  </li>
</ol>

If a conversion is missing, open the **Postback Log** tab in Tracker Settings to check whether the postback arrived.

See [Postbacks](/docs/tracker/postbacks/index.md).

---

## Next step

Before you send real traffic, add a tracking domain you own and make it your primary domain. See [Tracking Domain](/docs/tracker/tracking-domain/index.md).

Your starter domain sits under a domain shared with other Proferex accounts, so their traffic can affect how ad networks and browsers treat your links. Your own domain keeps your reputation separate and shows your brand.

Do it before your ads go live. Your campaign URLs and postback URL include the domain, so switching later means updating every ad and every postback setting.